Showing posts with label jacket. Show all posts

Wednesday, April 20, 2016

Quick Update-S1318

I got in some sewing time after work today! Rare occurrence of late at Casa Danvillegirl.

I attached the sleeves to the jacket and sewed the side seams.  I interfaced the front and neck bands, hoping to attach those but it is strange that we do have to eat dinner so had to stopped and whipped up something quick.

Here is the WIP.


I am comfortable with the sizes I chose to use for this pattern.  Hope to show the finish project soon.

Sunday, April 17, 2016

Simplicity 1318

I started on this project yesterday evening and would have liked to have completed it this evening. DH and smartphones and computers are just not in sync; I always get called into to help with those crisis.

Now I am just plain too tired to finish it so I will just let you know that the fabric, the machines and me have been in sync until his crisis.  All is well for him now!!!

Here is a shot of the pattern and the fabric.

I cut a small through the shoulders and upper chest area and then increased to medium from bust to bottom. I cut the length at xxs as I was too lazy to cut the medium and then adjust the length, this took off about an inch which was what I wanted.

All edges were serge finished.  The center back and shoulders are attached; one sleeve has been sewn and there is where I ended.  I love how the "simplicity" of this pattern.  My only dislike is that there are no finished measurements printed on the pattern pieces for bust, waist or hips.  On the envelope back it only gives the finished length for each version of the pattern--really???!!!!  I flat measured the pattern and determining that I might could get by with a small but decided to cut to medium as noted above; if too full then deeper seams are easy to do.

I think I will make Version A in the near future.  I like the cropped look of it.

That's all for now.

Friday, January 15, 2016

M7262

I wore my new sweater jacket, McCall's 7262.  I had time to take a few photos before going to doctor and work.


This past the wearability test.  It is little on the heavy side but was perfect warmth for today.  By the time I left work, it was raining and I was still comfortable!  I can see another one in a boucle type knit. 


Sunday, January 10, 2016

M7262 Complete

Well my first project for 2016 is finally complete.  Truly it has been completed for several days except I had not purchased nor sewn a heavy duty snap to the shoulder and top edge of the underlying front.

I still find myself not letting go of something until complete; thus not moving onto other projects in my queue.  When I do I sometimes end up with UFO's just taking up space and hanging around in the sewing room.  I wanted this complete as I want to wear while temperatures were not so frigid.  This will be a warm knit coat/sweater to wear but not against long periods of time outside when it is 30 degrees.

I have not taken photos yet of me wearing and will do so soon.  Here is views of the front and back hanging.


I like this pattern and considering making again; perhaps using a sweater knit instead of a textured double knit.  The fabric I used will definitely provide some warmth.

I was happy that I had buttons in stash to use----


The placement of the buttonholes and thus the buttons was challenging.  The underlying front piece is attached via a snap at the shoulder seam.  I had to keep pinning it in place to determine where exactly the buttonholes and buttons should fall.  Because of the mixed sizes I used this did somewhat impact buttonhole placement.  I perhaps should have spaced them further apart, yet they work as they are now allowing for the jacket to fall open more for sitting and driving.

My buttonhole stitches on my sewing machine are finicky and not always do the buttonhole programmed to duplicate themselves as they should after programming them for style and size.  Thus I had to remove one buttonhole which was tedious.  The one thing that I did was to use a water solvent material on top of the knit to help the buttonhole stitches not to sink down into the knit fabric. This worked very well. 

I am ready to move onto the next project once I decide what that will be. 

More later.


Saturday, January 02, 2016

First project for 2016!

I started this on December 31 with pin fitting the pattern, making adjustments to it and then I cut out the fabric.  Yesterday I made considerable progress with this and worked on it some this morning.  I ended up with a small but fixable issue with attaching the front band.  I stopped there for a small break and will finish it hopefully today.

The issue is more of my doing than the pattern.  This pattern has lots of ease, the length is very long for my height and the width would be overwhelming also if I used a straight 14.  I used a 14 for the collar, changed to 12 for the shoulders, back to a 14 under the arm to right above the waist line and then tapered to a 12 then to 10 to hemline.  I cut the length off at the size 8 cutting line.  Thus when I cut the front band piece I cut that at the size 10 length not thinking about the collar at size 14.

Instead of stitching both ends of the band at 5/8 I stitched at 3/8 and will have to turn the collar down a tad more than the current fold line.  I think this will work okay as there is a lot of collar length and being short this will I hope also eliminate too much fullness at the back neckline.  Will see.

I am using fabric I acquired from Gorgeous Fabrics-September 2015.  It is a nice textured fabric that originally I was going to make a dress with it but it is beefy and best used for a coat/jacket.
Here is a glimpse of yesterday's progress


Even though I used a 12 for the shoulder width, I ended up shaving off about 3/8 of inch from the shoulder to right above the front and back notches of the bodice.  That was a good fix for me.  Before cutting out the pattern, I reduced the length by 2 inches even though I had cut it to its shortest length. I adjusted the sleeve length as usual by one inch.  There is a fairly deep hem for the sleeves which will allow for other adjustments if needed.

More updates to follow.


Monday, November 30, 2015

B6169 Wearing

I had time to take a few photos this morning and just edited them to post the finished version of the jacket.  I highly recommend this pattern.  The instructions are good; I did not use their instructions for the lining preferring to bag my linings.

I ran out of time and did not get photos of the jacket partially zipped.  This gives you an idea of the length and overall fit.

Front view zipped all the way up

Back view

Side view
I made several fitting adjustments-forward shoulder, one inch FBA using Sandra Betzina method for princess seams, shortened the sleeves by one inch, swayback adjustment of 3/4 inch, high round back adjustment of 5/8 inch.

I plan to make one or two more versions of this jacket with one being for spring.

Sunday, November 29, 2015

Jacket is complete

I hope that everyone who celebrates Thanksgiving had a good one.  My DH and I spent time with friends in our hometown of Danville, VA for the holiday.  It was good to partake of great food and fellowship.  Weather was perfect for the day and spent time inside and out.

I was not able to complete my jacket to wear before Thanksgiving, it will be something new to wear to work when I return from my vaca/holiday time off.

Here are just a few glimpses of the jacket in process and me wearing.  I plan to take more photos when more appropriately dressed for the full view.

Back view-completed

Front view-completed
Wearing.
I like the jacket partially zipped the best.  When fully zipped, it feels confining.  More photos and a review to follow.


Saturday, November 14, 2015

Saturday updates

I finished cutting out the lining fabric this morning.  I have the serger threaded; I like to finish the edges of my jacket seams even though I am going to line the jacket.  I serge finish the lining fabric most times.  A few times in recent months I have not.  The seams are well protected as they are up against the jacket seams, so there should not be additional raveling.

What do you do with lining fabric- serge edges, pink the edges with pinking shears, or do nothing or do something else?

I just got home from grocery shopping as well as window shopping.  I did purchase a couple of sweater knit tops at Belks.  They were having a sale and I have not been able to sew as much as I had hoped on tops.  I have some knit tops that need to go to Goodwill.  Many are in good shape; I am just tired of wearing them and a few are just to large now.

Drinking a Peppermint Mocha to boost my energy and will head to sewing room soon.

More sewing updates later.

Sunday, November 01, 2015

Moving on to this next

After the wadder yesterday, this AM I spent time in my sewing room looking through fabrics I pulled for fall/winter sewing that I brought into the sewing room.  I decided it is time to sew a jacket.

I use to sew jackets a lot.  Then work styles changed and I began to sew more dresses.  Now because of an ongoing vein issue with my right leg, I wear pants a lot because of having to wear a compression stocking. Thus the reason of late for making so many tops to wear with pants.  So now it is time to make some jackets to wear for the cooler weather that will go with pants.

The fabric I will use is from Mood-an Italian wool blend. Purchased in 2013.
I will make this jacket from Butterick.


I began the pattern fitting process this afternoon. So far I have the two piece sleeves adjusted for length; width is good.  More fitting to do.  Updates later.

Saturday, January 17, 2015

No buttons for me and more fabrics

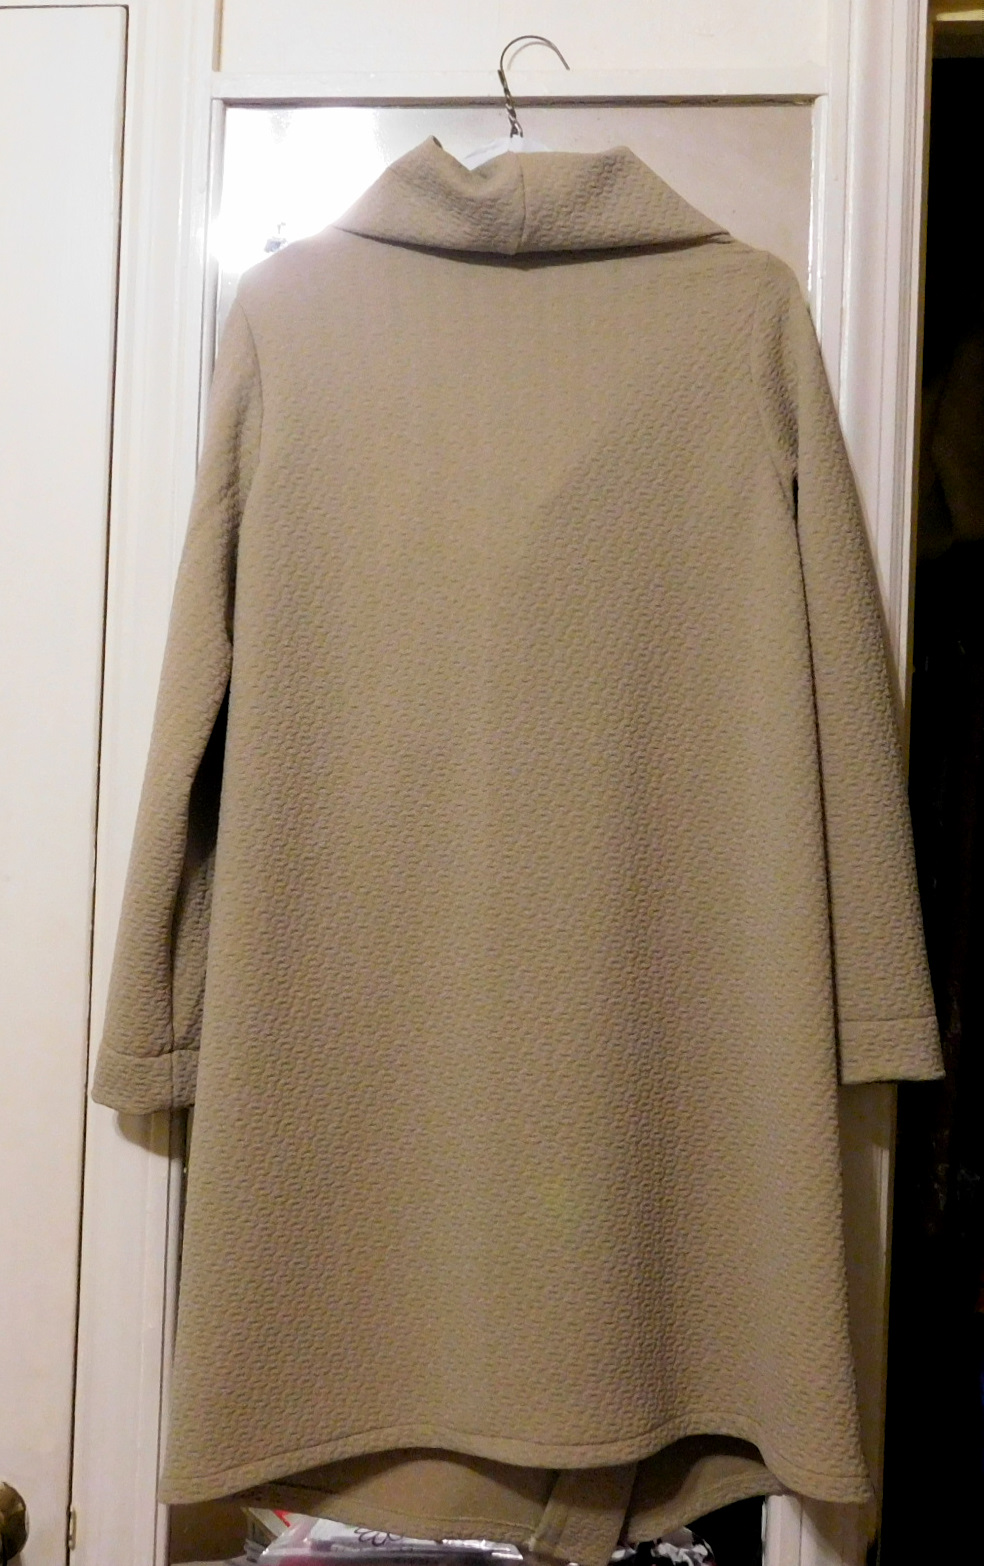
Butterick knit drape jacket is complete except for the button closure.  I made some test buttonholes on the fabric scraps as I had a concern about how a buttonhole would sew with this particular knit.  Not good at all from my test.  I used a washable stabilizer and still did not get good results.   My sewing machine makes good buttonholes on most fabric.

I then decided I would use my SnapSource and have in my stash several nice snaps.  Could not find my Size 24 Adapter for larger snaps and best for this garment. All my other size adapters were in the drawer, not this one.  I took everything out of several drawers thinking I had maybe placed it in a different one. Given the fact that I have not used this particular tool in several years, I really have no clue as to where it is.

I did find a lot of other "stuff" that I probably could give away to charity or possibly a giveaway here on my blog.  If anyone reading this does a lot of felting with felting machine or hand tool, leave me a comment as I have lots of merino wool yarn and other items that work well for felting projects.  They need a good home.

I go online to see if JoAnn's has the Size 24 Adapter and they do online only; my plan was to go right over to my local store and get one.  I ended up ordering from Amazon at a decent price and free shipping but will not get it until Tuesday.  So my jacket remains a UFO until then.

Now I have to decide what to sew next.  I have lots of ideas floating in my head and cannot settle on one.

While I have your attention, I realized that I have not posted photos of recent fabric purchases. Here are my latest; both of these fabrics are from Sew Much Fabric, a shop located in Texas. I purchased these in December. These items are way better than I expected.  The first one is black/gray/silver metallic/golden brown stripes.  The second one is full body double knit with white back ground with black squiggles.  There are raised areas on the white background.  I saw a lovely top and skirt review with this fabric on Pattern Review.


My recent purchases are from Mood and Sawyer Brook.  The first one is the Mood fabric, a black and white poly jacquard.  My plan was (is) to make a skirt from this.  I saw something similar on Pinterest.  The bottom one from SB is actually a polyester/rayon/lycra overprinted ponte knit.  It looks like leather but isn't, not even faux leather.  I saw something similar in a Chico's catalog and wanted to find similar fabric to make a sheath style dress.  I got an email from them detailing some of the new fabrics and jumped on this quickly.  I also decided to join their fabric swatch club.  Now I am even more tempted as the swatches they sent were lovely, yet somewhat pricey.

All for now.  I have to go get "cleaned up" for a benefit this evening that my agency is putting on promoting National Mentors Appreciation Month.  One of the programs that I oversee is working with at-risk youth.  Great group of youth who are making improvements in their lives with the help of mentors.  I am sure it will be a great event.  More later.

Wednesday, January 14, 2015

Same pattern plan, different fabric.

Saturday evening I spent time sewing up the black and white fabric for B5794.  Yes it did have 4 way stretch yet the drape was not good at all.  What you can not see from the photo of the fabric is that it has ridges for the black stripe and after attaching at the shoulders and basting side seams I realized that the fabric is to "stiff" to drape.

The other discovery was how big the pattern was going to be length wise as well as width through the front.  The pattern has no finished measurements printed on the pattern piece for the bust or hip. Since it is a medium (12-14)  I knew that it would fit, but the ease is a lot.  I came up with fixes for both.

Sunday sewing:  I had reduced the length by two inches before cutting out the fabric. I reduced it another two before cutting out the second fabric.  The second fabric is solid black and from my stash; an ITY knit from Fabric Mart.  Lovely feel and drape,much better for this pattern.

The front edges call for a 5/8 inch hem; I sewed one inch hem along the front edges, thus reducing some of the width.

I only need to find the perfect button and make the buttonhole and I will be finished.  It really is a simple pattern.  I dislike that it did not have finished measurements printed on the front pattern piece.
Here are photos of the back and front WIP on AlmaMarie.


Friday, January 02, 2015

I won a pattern!

I have been a member of Pattern Review for years.  Recently I have been reading posts there more frequently and participating in some discussions.  I receive a daily digest and enjoy reading through that early AM before getting ready for work or play.

Recently there was an article about Janet Pray, owner of Islander Sewing System.  I found it most interesting and learned more about her background.  Commenting on the blog post entered you in the opportunity to win a pattern, and I WON!!!   I recently signed up to take her class on Craftsy.

I am so happy about this pattern as it is another version of a moto-jacket.  I think I have the perfect fabric for this one.


Off to the sewing room!

Sunday, December 07, 2014

Tidbits-12-2014

Last week I wore several garments that I made earlier this year or even last month as well as one over a year ago.  The recent wears were:
 M6996.  got quite a few compliments about this jacket.  Most everyone spoke about the back peplum.  It was extremely cold the day I wore this and I wore a heavier sweater knit top (purchased years ago) with this and I stayed very warm.


I also wore this McCall's top my second one from this pattern.  This fabric was so easy to sew and though a little light weight it felt good next to the skin.

I also wore my first version of this top another day.  I posted about this top previously.

I had to attend a board meeting Thursday evening so I wore my reunion dress that day.  It wears well and not much wrinkles develop during the wearing; this is the kind of garment(s) I wear on the days that I will put in a 10-12 hours day.

I have decided to move on to making another dress or two or three as well as some skirts.  I just need to decide on what fabric and what pattern.

I need to take some photos of my new fabrics from a new to me fabric source and one I will defintely purchase from in the future.

More later.

Saturday, January 04, 2014

December Garment of the Month

I finally completed what was to be December Garment of the Month.  After making View A of M6844 in stash fabric and perfecting the fit, I cut out View C and cut out the boucle knit fabric from Fabric Mart.

I enjoyed sewing this project and can understand why so many other sewists have chosen to make this cardigan time and time again.

Many reviews indicate that the pattern runs large and that the fronts do meet.  I found that to be somewhat true.  When I sew a pattern that is sized by xs to xl, I always fall between what I size I really need.  As with this pattern, I purchased the xs-m because the bust measurement is the right size for the upper chest.  I need the large for my bust size but medium works great for my back.  The large was not included in this pattern so using the medium required a FBA.  I made a a one inch FBA and kept the resulting dart.

As many indicated the shoulders run large and with most McCall patterns for me the shoulder area is always to large, so adjusted them by about 3/8 inch; I also made a 3/8 inch narrow back adjustment as well.  The sleeves are very tight and many reviewers noted this.  On the black and white cardigan, I added actually two inches to the arms and ended up taking out an inch.  On the boucle knit after adjusting the sleeve pattern taking the adjustment to one inch extra, the sleeves are rather snug.  I think that the snugness is the difference in the knits and the amount of stretch.  Still wearable.  I also shortened the sleeve length by an inch which is a typical adjustment for me.

I made my usual sway back adjustment in View A and decided that the upper back length was still too long as it was pooling in the back.  I shortened an additional 1/2 inch making the back fit better.  I wish I had shortened the back peplum as the length is a little longer that I thought it would be and should I make another one, I will make that adjustment

Some reviewers indicated that the had an issue with attaching the neck band and had to really stretch it to meet at the bottom edge.  I cut the bottom edge of the band about 1/2 inch longer so when you sew the bottom edge of the two bands together it lined up well at the bottom.  I also sewed from the bottom up to the center back seam; then flipped the jacket over and sewed from the bottom of that side up to center back and all went together well.

Here is the garment on Alma Marie.


AlmaMarie is broader in the back than I am, so not as snug fitting on me. This boucle knit was fairly easy to sew.  It is a wool blend boucle knit so I think it will be warm.  Giving our current frigid temps I think I will well it often.


Saturday, November 16, 2013

Cordova complete


I finally finished this jacket.  And I am not really happy with the outcome.  I decided to complete it and most likely I will give it to charity.  Here are a few pics of the completed jacket.

Front view has separating zipper

Close up view of zipper and neckline


Back view

Inside view of lining-jacket not pressed
So far from what you have seen have you noticed the peplums that go from front to back?  Yeah, me neither.
And that is the issue and the reason I am not happy with the outcome. It is not really a problem with the pattern, it is my choice of fabric, it is rather "busy" so you just don't see where they are.

Even trying to show you the peplum you just can't see it.  If I had given this more thought I perhaps could have added piping in black.  I even pulled out some black ric-rac after the fact and that does not cut it. Another lesson learned and something I need to work on.  If the fabric was not so loosely woven and ravels just looking at it and because of the loose weave thread gets embedded in the weave, I found it most difficult to remove stitches.  I decided not to undo the peplum area stitches to add piping.

As to this jacket patten-it runs large!! I even went down a size in upper area and then went to larger size from waist to bottom.  This was my focused concern about this jacket once I began sewing and fitting.  Before making the final lining attachment, I made several fitting changes to earlier ones.
  1. Biceps are huge, ended up taking a one inch seam from about an inch under the arm to about 3 inches above wrist.
  2. Took a deeper center back seam earlier on in the sewing process.
  3. Took an additional 1/2 inch seam in the front/side front seam area from shoulder down to upper bust area.  Then took an additional 1/2 inch seam from right under the bust to top of front area peplum.
  4. Took an additional 1/2 inch seam  right above and below waist area.  
All of these adjustments helped fit the jacket better and definitely helped make it look less boxy.  Nonetheless, because you can not see the distinction between the jacket and the peplum due to fabric choice it just looks more like a semi fitting straight jacket, just as it looks on the hanger.

You win some, you lose some.  Next up skirts!


Tuesday, November 12, 2013

It's almost a completed jacket

I have completed the lining unit and attaching my way instead of per instructions.  I don't like hand stitching and the instructions call for catching stitching the lining hem and sleeve linings by hand.  I prefer to "bag" the lining and eliminates a lot of hand stitching.

I had attached one of the sleeve linings to the sleeve yesterday.  I decided to try on the jacket to be sure that the sleeve lining and sleeve were hanging right.  I realized at that point just how wide the sleeve was and even if I wore a sweater top under the jacket I would have more than enough sleeve room.  So I have some more tweaking to do with sleeve width in the upper arm area, at wrist sleeve is okay. 

I did not get to do any sewing after work last night so jacket is waiting for my undivided attention on the sewing machine.

Photos and more to follow.

Sunday, November 03, 2013

It's looking like a jacket

I have made good progress with the Cordova jacket this weekend.  The jacket unit is complete with sleeves attached and separating zipper installed.  I began working on the lining unit and will attach that somewhat differently than the instructions call for.

I still need to tweak the bodice portion some in the front.  I took a deeper center back seam which helped fit better and you can actually see the peplum from the rear.  The front looks rather boxy still and the peplum is not so noticeable; the pattern drawings show this as being more distinct and more of fitted waist area.

I will make this adjustments before attaching the lining unit.

This fabric has been a true bear to work with.  Stitches get lost in the fabric and having to take apart seams have been troublesome. Now that I have most of the fitting issues resolved, a jacket in another fabric may be in the future. 
Posted by Picasa

Sunday, October 27, 2013

Jacket update

I decided that I would use "Design Plus" fusible bias stay tape for the remaining edges of the jacket.
If you look at this fabric wrong, it ravels! 

I discovered that I was looking at View A peplum instructions; this view has double peplums.  So the lining of the peplum yesterday proved to be a waste of time.  I also realized this morning when fixing my first cup of coffee that I had not adjusted the front area of the peplum to match the added length due to FBA.  Thankfully I had enough fabric to cut out another peplum.  Here is the adjusted peplum piece with the 1.5 inch adjustment.  I had added 5/8 to the side back pattern piece for hip fluff and had added that to the peplum piece when I first cut out the pattern.
I attached the peplum pieces to front and back.  I tried on the jacket for additional fitting.  My jacket is looking more boxy than the drawing of the patterns on the pattern envelope and instruction sheet.  It looks like I really need to take deeper seams at center and side back seams as well as side seams from waist to hip area. 

I realize that this pattern line is drafted more for a pear shape person and I am definitely not that shape.  I cut the shoulder and upper chest at size 12 tapering to 16 at bust down.  Big mistake on my part, yet that is what I usually do with Vogue and Butterick.   All in all it is better that it is too large then too small.

More updates later.

Saturday, October 26, 2013

Cordova update

I have made considerable progress on this jacket.   Of course I have chosen a fabric that ravels very much.  I used "Hug Snug" on the various seams.  I made the decision to do this as I knew that the edges needed this even if I am lining the jacket.  The weave is not real loose but loose enough to have a lot of raveling.  Serge finishing the edges did not go very well at all.  Sewing the bias binding to the seam edges took more time but in the end worth it.

The front/side front and back/side back pieces are sewn.  Peplum pieces are lined.  Next step sew the shoulders and sides seams; attach peplum; install separating zipper; sew front and back lining; insert sleeves in jacket and jacket lining; attach jacket and lining units.

Here is a collage of the various stages of the jacket in progress:
Upper left photo-showing how the fabric ravels
Upper right-Hug Snug attached
Middle left- front pieces pinned to Alma Marie
Middle right-back pieces pinned to Alma Marie
Bottom left-peplum
Bottom right-lining side of peplum

Thursday, October 24, 2013

It's beginning to look

like a jacket!

I had planned to show a photo of the jacket back but camera not working until battery is recharged.

I will say that the fabric, a boucle type, is rather raveling and I decided even though I am going to line it to encase the seams in Hug Snug rayon bias binding.  I could have serged edges but I think this binding will also give it some firmness that I think is needed for the seams as it is more loosely woven than I first thought.

Pictures to follow soon.

August Sewing Simplicity 7295

 I am not doing well as a blogger. I have been working on this project since July 30. Today, I finally finished it. It has been a stop-and-g...