I got sewing time in this weekend--yeah! My lightweight denim dress is almost complete! This has taken forever it seems.
Here is the dress in it final stages minus buttonholes and buttons. Warning-it really does not look all that great in this photo.
I am contemplating going with antique brass snaps and using my snap setter instead of sewing buttonholes and buttons. The size 24 snaps are the same as 1/2 inch buttons that the pattern calls for.
Here is a close up of the collar band.
I decided not to add the collar to the neckband. Due in part to the how this sits at my neck now and not wanting to have yet another piece of fabric there. In an earlier post I said something about becoming a duster if I don't like how the dress looks when completed. This collar stand reminds me of the Nehru collars and long length jackets of the late '60's and early '70's.
It it hard to tell but I use gold jean thread for topstitching the front bands, 5/8 hem and around the collar. I may go back and topstitch the princess seams. I still have a tweak or two to make with the back seams, so did not do this topstitching earlier.
I am so ready to move onto my next project!
Thanks for stopping by!
Showing posts with label McCall's. Show all posts
Monday, September 12, 2016
Sunday, September 04, 2016
30 minutes a day
I signed up for Star's 30 minutes a day sewing related time. I think I have been hitting that target. I am still working on McCall's 6124 pattern. I have added the sleeves and attached the front band. What's left to do is attached collar stand and collar, button holes and buttons, hemming.
I have had to sew intermittently because I have pulled a muscle in my lower back so sitting makes it worse, standing and walking helps. The dress has required lots of fitting adjustments made while sewing it. This is one of those projects that is taking longer to sew and I start losing interest in.
This is how the dress looked when I stopped sewing last night
Since then I have folded the front bands and stitched. Getting ready to sew the 5/8 inch hem.
More later!
I have had to sew intermittently because I have pulled a muscle in my lower back so sitting makes it worse, standing and walking helps. The dress has required lots of fitting adjustments made while sewing it. This is one of those projects that is taking longer to sew and I start losing interest in.
This is how the dress looked when I stopped sewing last night
More later!
Saturday, August 27, 2016
I've been sewing
I found some sewing mojo! I have been working on the chambray dress using McCall's 6124. I have had to make a few adjustments upper back to wide so took a deeper seam in upper center back seam, side back seam to tight over hip area and also adjusted side seam for hip area.
I made a 1 inch FBA, had to go back and reduce princess seams in bust area from 5/8 to 3/8 inch. My usual adjustments included forward shoulder, sway back and petite length adjustment.
Pictures to follow of work in progress later.
I made a 1 inch FBA, had to go back and reduce princess seams in bust area from 5/8 to 3/8 inch. My usual adjustments included forward shoulder, sway back and petite length adjustment.
Pictures to follow of work in progress later.
Saturday, August 13, 2016
What's next?
As a member of the Sew a Garment A Month group on Facebook, August idea was to select three patterns from stash and then narrow this down to one. Being a person who normally deviates from rules from time to time, I pulled five pants patterns, most recently purchased-meaning purchased this year-and read through some of the instructions with two of them. I then proceeded to go a totally different route and decided to make a denim dress using this McCall's pattern.
I have had this fabric in stash only for a short period of time. I purchased the same time that I bought a stretch denim from JoAnn's to make a trial version of the Jalie Eleanor pull on jeans earlier this year.
I have cut around the pattern pieces and will do pin fitting later.
I continue to avoid sewing pants. It just feels like a hassle. And for me probably a lot of fiddling with the fit. I am short in length from waist to hip, not the normal 7-9 inches below the waist. I now have a flatter rear, when it once was very round. I have a tummy pouch. My front and back have changed positions. 🙁 I can buy pants from Talbots Petites and they fit very well with a few exceptions. They can be pricey as well, yet they hold up well with a lot of wearing so I do think I get my money's worth.
Still I need to put to use all the Craftsy lessons on pant fitting I have watched.
More later!
I have had this fabric in stash only for a short period of time. I purchased the same time that I bought a stretch denim from JoAnn's to make a trial version of the Jalie Eleanor pull on jeans earlier this year.
I have cut around the pattern pieces and will do pin fitting later.
I continue to avoid sewing pants. It just feels like a hassle. And for me probably a lot of fiddling with the fit. I am short in length from waist to hip, not the normal 7-9 inches below the waist. I now have a flatter rear, when it once was very round. I have a tummy pouch. My front and back have changed positions. 🙁 I can buy pants from Talbots Petites and they fit very well with a few exceptions. They can be pricey as well, yet they hold up well with a lot of wearing so I do think I get my money's worth.
Still I need to put to use all the Craftsy lessons on pant fitting I have watched.
More later!
What's next?
As a member of the Sew a Garment A Month group on Facebook, August idea was to select three patterns from stash and then narrow this down to one. Being a person who normally deviates from rules from time to time, I pulled five pants patterns, most recently purchased-meaning purchased this year-and read through some of the instructions with two of them. I then proceeded to go a totally different route and decided to make a denim dress using this McCall's pattern.
I have had this fabric in stash only for a short period of time. I purchased the same time that I bought a stretch denim from JoAnn's to make a trial version of the Jalie Eleanor pull on jeans earlier this year.
I have cut around the pattern pieces and will do pin fitting later.
I continue to avoid sewing pants. It just feels like a hassle. And for me probably a lot of fiddling with the fit. I am short in length from waist to hip, not the normal 7-9 inches below the waist. I now have a flatter rear, when it once was very round. I have a tummy pouch. My front and back have changed positions. 🙁 I can buy pants from Talbots Petites and they fit very well with a few exceptions. They can be pricey as well, yet they hold up well with a lot of wearing so I do think I get my money's worth.
Still I need to put to use all the Craftsy lessons on pant fitting I have watched.
More later!
I have had this fabric in stash only for a short period of time. I purchased the same time that I bought a stretch denim from JoAnn's to make a trial version of the Jalie Eleanor pull on jeans earlier this year.
I have cut around the pattern pieces and will do pin fitting later.
I continue to avoid sewing pants. It just feels like a hassle. And for me probably a lot of fiddling with the fit. I am short in length from waist to hip, not the normal 7-9 inches below the waist. I now have a flatter rear, when it once was very round. I have a tummy pouch. My front and back have changed positions. 🙁 I can buy pants from Talbots Petites and they fit very well with a few exceptions. They can be pricey as well, yet they hold up well with a lot of wearing so I do think I get my money's worth.
Still I need to put to use all the Craftsy lessons on pant fitting I have watched.
More later!
Tuesday, August 09, 2016
Version 3 McCall's 6964
This weekend I completed my third garment that I had planned to sew on my staycation. This is becoming a TNT for me. My first version was this one and I still wear it often during cooler weather.
The print fabric was from EOS and the black sleeves were more of an illusion knit from Fabric.com
My second version did not turnout so well. I used another print fabric from EOS and used a solid neckband and short sleeve in a green color also from EOS.
The print fabric was from EOS and the black sleeves were more of an illusion knit from Fabric.com
My second version did not turnout so well. I used another print fabric from EOS and used a solid neckband and short sleeve in a green color also from EOS.
For some reason the neckband never would lay flat and even inserting some elastic thread in the back neckband under the serged stitches did not help at all. This is one I wear only at home as I truly dislike how it looks. I also wish I used a different color for the sleeves and neckband.
This is my third version which turned out well.
I took photos last night after work and if I stand with my arms by my side I look like one big floral person. This fabric has been around a long time. I looked through fabric photos back to 2010 and did not find it there. It may have come from Fabric Mart or Fabric.com.
Here is the back view. The colors are more muted in this photo, I don't think I had the flash engaged.
I used my coverstitch machine for the sleeve and bodice hems. I should have used it for the neckband also, instead I top stitched that area.
One more fabric out of my stash. I have more of this fabric leftover and may just donate it to Goodwill. I think I only need one garment from this floral print.
Next up-pants!
Saturday, July 30, 2016
Jalie 3245
Raglan tees have been very popular through out the blogsphere. I have purchased quite a few patterns for this style with success and misses.. The first one I made was a Kwik Sew version in 2014. I like this one though a little snug. I used a heavier weight knit for this one and still wear it on occasion.
I made another one using McCall's. The fit is good with this one, I just don't like the red velvety knit I used. I do love the lace overlay.
I attempted a Burda and Angela Wolf versions; they were never completed as something went wrong during construction and I had no desire to fix the issues.
I have a few favorite raglan tops I have saved on Pinterest and I posted about here.
For this top I used Jalie 3245 and with some adjustments before and during sewing I created a top I really like.
Some adjustments made were raising the front neckline by about 2 inches, making a 3/4 inch swayback adjustment, adding a 1/2 inch to hip area and making 1/2 inch FBA using pivot method on front only. I used Size Y for the upper chest and neckline and transitioned to AA from there.
During the fitting process I ended up taking 5/8 seam allowance at the front and back sleeves area where it attaches to the bodice. I also ended up taking 1/2 inch seam from waist to bottom and 5/8 above waist through the sleeves. The seam allowance called for with the pattern was 1/4. Obviously I could have used Size Y and Z. Yet I will keep my traced pattern as it is now and have noted to take deeper seams.
I serged this throughout after basting the side seam for fitting. I used my coverstitch machine for the hems on the sleeves, the bodice hem and neckline.
I see more use of this pattern in the future. I do have a couple of other indie patterns to try also.
I wore this to work yesterday, another casual Friday look for me. The wearability of this was perfect.
I was in a store and paying for my purchase. The sales person asked where I got this top, I told her it was a "Danville Girl Design" and she said she had not heard of this line before. I then told her I made it. She was impressed and said she had ordered a similar top from LuLaRoe.
Next project waiting for completion is Maria Denmark Kimono Top. I only need to hem the bodice and I am done. I have a McCall's pattern cut out and ready to sew. I have made this particular pattern twice. This is becoming a TNT for me.
More later.
Saturday, June 25, 2016
Patterns Recently Purchased and Sewing Progress
I mentioned in a previous post that I took advantage of McCall's and Simplicity pattern sale. I finally got around to taking some pictures of the patterns.
Here are some pictures of the patterns:
Today I have been working on completing the Simplicity top. I had to make some fitting adjustments after I had basted the side seams and the shoulders. The top is rather full and based on the finished bust and hip measurements I did not have to make any fitting adjustments in those areas.
I ended up taking deeper underarm seams and this is sometimes necessary with this type of type sleeve. I took a deeper seam right under the bust curve and ended up taking deeper back seam as well.
I used a small size in the neckline, shoulder and upper chest area. I ended up with a gap at the back neck closing. I had to make an adjustment in that area which resulted in the elimination of the back opening as I could easily pull the top over my head without a button and loop closure.
I only have to hem the bodice of the top and I will finally be finished with this pattern. I like the outcome, it has just taken be more time to sew this than I anticipated.
I hope your sewing weekend has been productive.
Here are some pictures of the patterns:
Today I have been working on completing the Simplicity top. I had to make some fitting adjustments after I had basted the side seams and the shoulders. The top is rather full and based on the finished bust and hip measurements I did not have to make any fitting adjustments in those areas.
I ended up taking deeper underarm seams and this is sometimes necessary with this type of type sleeve. I took a deeper seam right under the bust curve and ended up taking deeper back seam as well.
I used a small size in the neckline, shoulder and upper chest area. I ended up with a gap at the back neck closing. I had to make an adjustment in that area which resulted in the elimination of the back opening as I could easily pull the top over my head without a button and loop closure.
I only have to hem the bodice of the top and I will finally be finished with this pattern. I like the outcome, it has just taken be more time to sew this than I anticipated.
I hope your sewing weekend has been productive.
Thursday, June 02, 2016
Next Project
I want to make McCall's 7359 next. I am browsing through my fabric collection to see if I can find something from it. One fabric I keep coming back to is one I purchased from EmmaOneSock, February 2014.
This is a rayon-viscose. I wanted to make a top with contrasting fabric for bodice and yoke. Just not finding the right color or texture to go with this fabric. I am continuing to search through stash for other contrasting fabrics that I may use instead.
Sunday, April 10, 2016
Tunic Wadder
I decided today that my new tunic will find a new owner when I donate this to Goodwill.
This project has not gone all that well from the beginning. The fabric is lovely but a bear to deal with. The other issue for me with this is that I am not sure why I wanted to try this style. I am rather full busted so gatherings around a front placket are not very attractive on me; especially when it is such a close fit. Though I did a FBA I need more than what I adjusted. The style looked rather like a maternity top on me when I tried it on for fitting; I should have taken a fitting earlier in the sewing process. Not that it would have changed my mind about the style on me.
A real dislike about the pattern was the tie neck binding. The neckband was very narrow and after taking a 3/8 inch seam, I could not get the strip turned inside out. I used to have Fasturn notion that would help with this but those got messed up years ago and I never replaced them. I ended up damaging two strips in the turning inside out process with no success.
I came up with an alternative and used fold over elastic. It worked okay. I could go on and on, but I won't. I am chalking this up to a nice tunic, just not for me.
To make a long story short, here is my tunic top that's a wadder for me but hopefully for some shopper at Goodwill it will have a new home.
On to my next project. I plan to make a kimono jacket from fabric I acquired from Fabric Mart last July. I was a Julie's Pick Swatch Member and this was in the July swatch mailer.
This project has not gone all that well from the beginning. The fabric is lovely but a bear to deal with. The other issue for me with this is that I am not sure why I wanted to try this style. I am rather full busted so gatherings around a front placket are not very attractive on me; especially when it is such a close fit. Though I did a FBA I need more than what I adjusted. The style looked rather like a maternity top on me when I tried it on for fitting; I should have taken a fitting earlier in the sewing process. Not that it would have changed my mind about the style on me.
A real dislike about the pattern was the tie neck binding. The neckband was very narrow and after taking a 3/8 inch seam, I could not get the strip turned inside out. I used to have Fasturn notion that would help with this but those got messed up years ago and I never replaced them. I ended up damaging two strips in the turning inside out process with no success.
I came up with an alternative and used fold over elastic. It worked okay. I could go on and on, but I won't. I am chalking this up to a nice tunic, just not for me.
To make a long story short, here is my tunic top that's a wadder for me but hopefully for some shopper at Goodwill it will have a new home.
On to my next project. I plan to make a kimono jacket from fabric I acquired from Fabric Mart last July. I was a Julie's Pick Swatch Member and this was in the July swatch mailer.
As always more sewing posts to follow.
Saturday, April 02, 2016
New Project
I began a new project today, starting with cutting out the fabric this morning. I purchased this fabric from EOS in March 2014. Lovely fabric, slight drape, cotton viscose. I previously washed the fabric so with a little pressing it was ready to cut.
The front yoke in the center was somewhat of a challenge to insert. I don't like how the instructions are for this as it requires a lot of hand stitching and I avoid that as much as possible. So I did my own thing. I still think there is a better way to do this with a nicer look on the inside, better than what I achieve with machine.
Here is where I left the project earlier this evening.
I hope your weekend has allowed for some sewing time. As always more updates to follow.
Here is where I left the project earlier this evening.
I hope your weekend has allowed for some sewing time. As always more updates to follow.
Monday, March 28, 2016
M7019 Version 2
I thought that this project was going to do me in or I was going to do end this project!!!!
This is a simple, easy to sew pattern that I made previously. So all adjustments were made and I thought quick and done. That also meant that my other project to do over the holiday and extended weekend would be complete.
An earlier post showed my original plan to use this royal blue fabric from Fabric Mart with Girl Charlee Aztec knit.
The Aztec print just doesn't do much for me at this time. Also it was a different weight and blend of knit that I decided would not do well with the solid knit.
So I went to my stash and pulled this fabric, from Vogue Fabrics.
This knit was similar to the solid yet was a little thinner texture. It proved to be somewhat of a nightmare to work with. I have learned over the years to purchase more fabric when buying online than what a pattern calls for as you never know what may happen during the sewing process.
Removing stitches from this knit was terrible, the least little pull on a thread could easily create a small hole. Not knowing that when I began the project I decided that I would serge this top for all the seams and then I had issues with the serger, more operator issue than the serger. The issue required that I restitch one shoulder seam that led to one to many holes in the that shoulder seam and then a big rip. Thus I re-cut the pattern pieces again and thankfully I had enough of the print fabric to do this. I almost ended the project but persevered and completed the project.
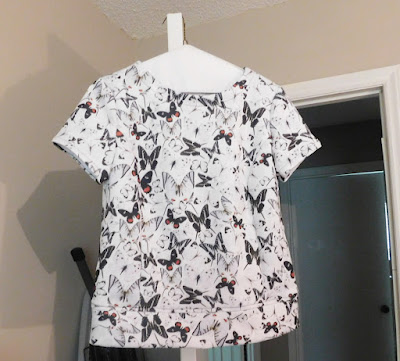
Here is the top on a hanger, photos wearing to be produced later this week.
I am pleased with the fit and the final outcome. Getting there was a heck of journey.
This is a simple, easy to sew pattern that I made previously. So all adjustments were made and I thought quick and done. That also meant that my other project to do over the holiday and extended weekend would be complete.
An earlier post showed my original plan to use this royal blue fabric from Fabric Mart with Girl Charlee Aztec knit.
The Aztec print just doesn't do much for me at this time. Also it was a different weight and blend of knit that I decided would not do well with the solid knit.
So I went to my stash and pulled this fabric, from Vogue Fabrics.
This knit was similar to the solid yet was a little thinner texture. It proved to be somewhat of a nightmare to work with. I have learned over the years to purchase more fabric when buying online than what a pattern calls for as you never know what may happen during the sewing process.
Removing stitches from this knit was terrible, the least little pull on a thread could easily create a small hole. Not knowing that when I began the project I decided that I would serge this top for all the seams and then I had issues with the serger, more operator issue than the serger. The issue required that I restitch one shoulder seam that led to one to many holes in the that shoulder seam and then a big rip. Thus I re-cut the pattern pieces again and thankfully I had enough of the print fabric to do this. I almost ended the project but persevered and completed the project.
Here is the top on a hanger, photos wearing to be produced later this week.
![]() |
| Back View |
![]() | |||
| Front View |
Monday, March 14, 2016
Up next
Now that my Freaky Feb. project is complete I am on to March Moreish sewing, which is sewing more of a certain pattern, fabric, tops, skirts, etc. My more is going to be tops/blouses/tunics.
So I am going to make the following two items soon. One is this McCall's pattern I just purchased last week
I love the fabric the model is wearing and hopefully can find something in a border print as lovely as this. For now I will use fabric I purchased from EOS in March 2014. A lovely lightweight viscose cotton fabric. I think it will result in the same drapery look as I see with the models version.
So I am going to make the following two items soon. One is this McCall's pattern I just purchased last week
![]() |
| M7284 |
I saw Lori's top on her blog Girls in the Garden and liked how hers looked. I plan to make the same one that the model is wearing on the envelope cover. Though I won't be using a a contrast fabric for the yoke at the center front and shoulders, unless I find something in my stash between now and the time I cut and sew the pattern. Somewhat doubtful I will.
The other pattern I plan to sew is one I have sewn before using lovely fabric from Sew Much Fabric and Mood for the solid black.
| Fabric Mart-2015 |
For the contrast piece I plan to use this Aztec print fabric included in the Girl Charlee's January Knit Fix to go with this Fabric Mart solid. Unless I find something different in my stash. I was not all that crazy over the selections included in the knit fix but this one has the blue color throughout the print making it a little more appealing.
Thanks for stopping by and updates to follow.
Friday, January 15, 2016
M7262
I wore my new sweater jacket, McCall's 7262. I had time to take a few photos before going to doctor and work.
This past the wearability test. It is little on the heavy side but was perfect warmth for today. By the time I left work, it was raining and I was still comfortable! I can see another one in a boucle type knit.
Sunday, January 10, 2016
M7262 Complete
Well my first project for 2016 is finally complete. Truly it has been completed for several days except I had not purchased nor sewn a heavy duty snap to the shoulder and top edge of the underlying front.
I still find myself not letting go of something until complete; thus not moving onto other projects in my queue. When I do I sometimes end up with UFO's just taking up space and hanging around in the sewing room. I wanted this complete as I want to wear while temperatures were not so frigid. This will be a warm knit coat/sweater to wear but not against long periods of time outside when it is 30 degrees.
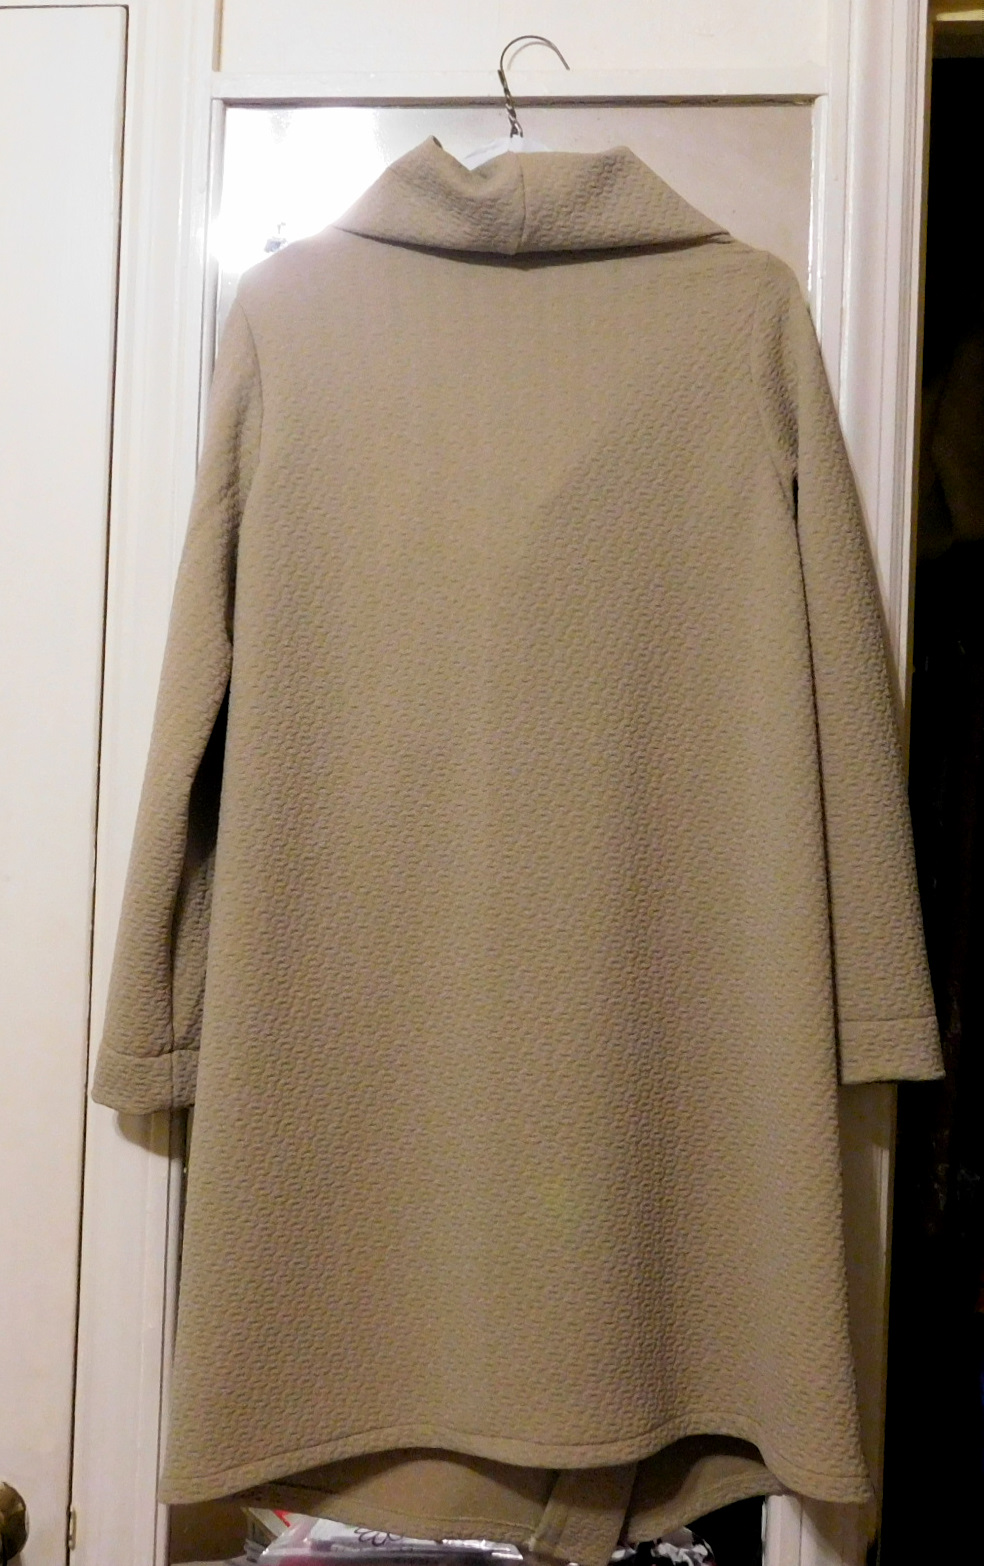
I have not taken photos yet of me wearing and will do so soon. Here is views of the front and back hanging.
I still find myself not letting go of something until complete; thus not moving onto other projects in my queue. When I do I sometimes end up with UFO's just taking up space and hanging around in the sewing room. I wanted this complete as I want to wear while temperatures were not so frigid. This will be a warm knit coat/sweater to wear but not against long periods of time outside when it is 30 degrees.
I have not taken photos yet of me wearing and will do so soon. Here is views of the front and back hanging.
I like this pattern and considering making again; perhaps using a sweater knit instead of a textured double knit. The fabric I used will definitely provide some warmth.
I was happy that I had buttons in stash to use----
The placement of the buttonholes and thus the buttons was challenging. The underlying front piece is attached via a snap at the shoulder seam. I had to keep pinning it in place to determine where exactly the buttonholes and buttons should fall. Because of the mixed sizes I used this did somewhat impact buttonhole placement. I perhaps should have spaced them further apart, yet they work as they are now allowing for the jacket to fall open more for sitting and driving.
My buttonhole stitches on my sewing machine are finicky and not always do the buttonhole programmed to duplicate themselves as they should after programming them for style and size. Thus I had to remove one buttonhole which was tedious. The one thing that I did was to use a water solvent material on top of the knit to help the buttonhole stitches not to sink down into the knit fabric. This worked very well.
I am ready to move onto the next project once I decide what that will be.
More later.
Saturday, January 02, 2016
First project for 2016!
I started this on December 31 with pin fitting the pattern, making adjustments to it and then I cut out the fabric. Yesterday I made considerable progress with this and worked on it some this morning. I ended up with a small but fixable issue with attaching the front band. I stopped there for a small break and will finish it hopefully today.
The issue is more of my doing than the pattern. This pattern has lots of ease, the length is very long for my height and the width would be overwhelming also if I used a straight 14. I used a 14 for the collar, changed to 12 for the shoulders, back to a 14 under the arm to right above the waist line and then tapered to a 12 then to 10 to hemline. I cut the length off at the size 8 cutting line. Thus when I cut the front band piece I cut that at the size 10 length not thinking about the collar at size 14.
Instead of stitching both ends of the band at 5/8 I stitched at 3/8 and will have to turn the collar down a tad more than the current fold line. I think this will work okay as there is a lot of collar length and being short this will I hope also eliminate too much fullness at the back neckline. Will see.
I am using fabric I acquired from Gorgeous Fabrics-September 2015. It is a nice textured fabric that originally I was going to make a dress with it but it is beefy and best used for a coat/jacket.
Here is a glimpse of yesterday's progress
The issue is more of my doing than the pattern. This pattern has lots of ease, the length is very long for my height and the width would be overwhelming also if I used a straight 14. I used a 14 for the collar, changed to 12 for the shoulders, back to a 14 under the arm to right above the waist line and then tapered to a 12 then to 10 to hemline. I cut the length off at the size 8 cutting line. Thus when I cut the front band piece I cut that at the size 10 length not thinking about the collar at size 14.
Instead of stitching both ends of the band at 5/8 I stitched at 3/8 and will have to turn the collar down a tad more than the current fold line. I think this will work okay as there is a lot of collar length and being short this will I hope also eliminate too much fullness at the back neckline. Will see.
I am using fabric I acquired from Gorgeous Fabrics-September 2015. It is a nice textured fabric that originally I was going to make a dress with it but it is beefy and best used for a coat/jacket.
Here is a glimpse of yesterday's progress
Even though I used a 12 for the shoulder width, I ended up shaving off about 3/8 of inch from the shoulder to right above the front and back notches of the bodice. That was a good fix for me. Before cutting out the pattern, I reduced the length by 2 inches even though I had cut it to its shortest length. I adjusted the sleeve length as usual by one inch. There is a fairly deep hem for the sleeves which will allow for other adjustments if needed.
More updates to follow.
Monday, November 02, 2015
Subscribe to:
Posts (Atom)
August Sewing Simplicity 7295
I am not doing well as a blogger. I have been working on this project since July 30. Today, I finally finished it. It has been a stop-and-g...
-
I am not doing well as a blogger. I have been working on this project since July 30. Today, I finally finished it. It has been a stop-and-g...
-
Recent sewing projects I've completed have been challenging. It is the first time in probably months that I started a dress pattern a...