Showing posts with label cotton stretch. Show all posts

Sunday, June 01, 2014

It's beginning to look

like a new floral print dress.

Since my last post I have made quite a bit of progress.  Completed all the pattern adjustments, cut out the fabric and lining, and started some sewing early this AM.  I took the following photos and then had a brief window of time to complete the lining for the front of the dress. 

Dress front, did not add piping.

Side view of dress on Alma Marie. 

Lining in progress this AM, now is complete
Hopefully will find time during the week to sew in short spurts as I know being away from office for a week will have a lot of challenges for me when I return.  I did enjoy my time off and have a glimpse of what retirement might look like!!!


Sunday, May 20, 2012

Status of sewing today

I made some progress on the dress today.  With my neck and shoulder issue, sewing is slower than molasses.  I have to take some frequent breaks.

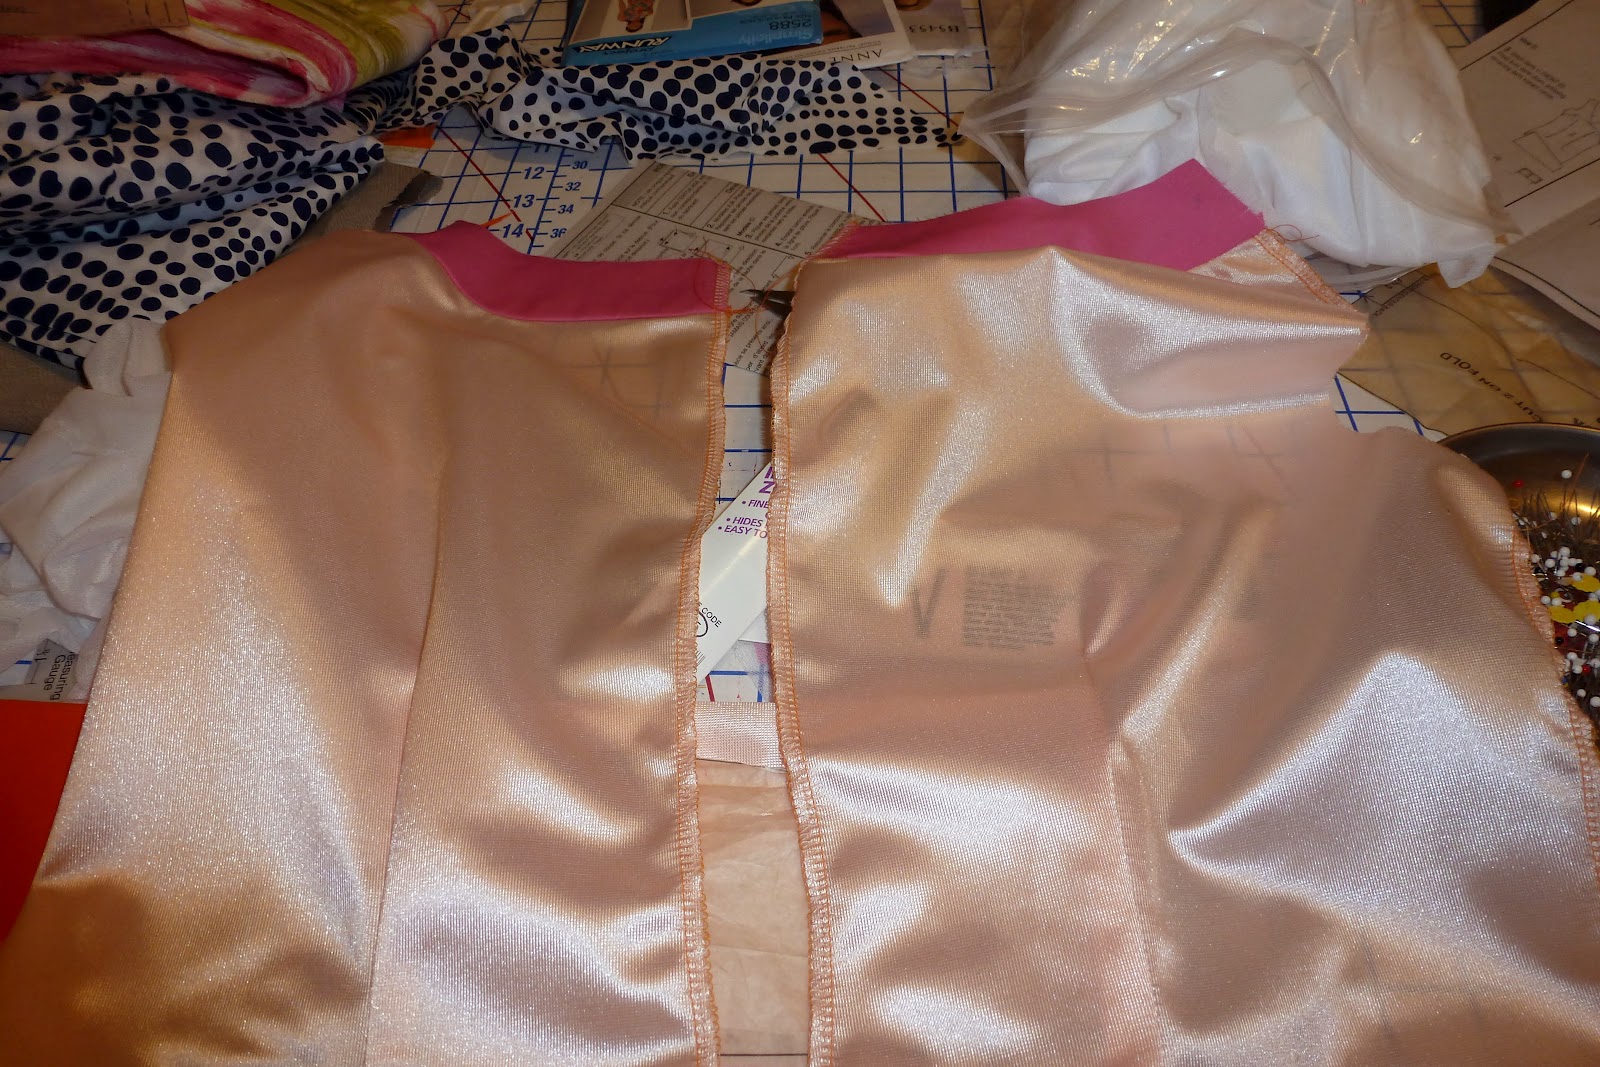
I started sewing the back pieces first as I have some concerns with the new dart developed from the FBA I made and decided that I would tackle that later.  I am also not following the instructions for attaching the neckband and lining.  I find that the instructions for this particular pattern for lining is just way too many steps and way to much hand stitching.

I attached the back neckband to the back pieces;I then inserted an invisible zipper.  I had to restitch one side of the zipper as the neckbands did not line up correctly the first time.

The neckband was a lighter weight cotton than the cotton herringbone dress fabric.  I used two layers of the interfacing material to give it more body and bring it closer to the weight of the tangerine fabric.


I also completed the lining fabric and attached the facing neckband to the lining fabric.
The lining fabric is a tricot fabric, without stretch.

I stitched the waistline darts for the front lining piece and basted the side dart.  I stopped there for the day.  I will attach the front neckbands to front fabric and lining next.  The plan then is to test fit the lining unit after stitching front to back at shoulders and basting the side seams.  I am hoping the side dart is placed appropriately.  The tissue fitting of the pattern worked well but sometimes with fabric the dart points need tweaking.

Saturday, March 17, 2012

UPS and USPS delivers

I received my Style Arc patterns earlier this week.  I am excited to give them a try.  I just hope that I picked the right size.  Since they are not multi-sized, I went with what I thought would be the right size.  I have read several reviews of these patterns and decided that I would buy what I would buy in ready to wear.  My body is all over the place when it comes to sizing and I am petite also which makes lengthwise adjustments necessary also.

I also ordered from Sew Baby the My Image pattern magazine for spring/summer and that arrived the same day as well.  I have posted a note on my computer saying "No more patterns for three months".  I really have more than enough and really need to list some for others who may have a need/desire for some that I have that I know will never get made.

Yesterday the postman delivered the Spring 2012 Vogue Fabric swatches.  There are numerous fabrics in this one that I am truly drooling over.  I see something of those arriving to my house soon.  And I also received some fabric from EOS.  I got the final 2.33 yards of this cotton woven with Lycra and may have to change my plans on what this will become.  Originally I was thinking dress, but a skirt will work also.

Updates later.  Off to work on the green dress.

Sunday, June 19, 2011

Can we get a WooHoo?

The dress is complete!  Woo Hoo!  I still have to sew on a hook and eye, still have not done that yet for this dress or the other two!!!!  Still plan to do it, but after posting this I am off to fix some dinner!

As they say, pictures are worth a thousand words so -----

Butterick 5638

With all those flowers it is very hard to see the princess seaming, and the neckline ruffles in the photo.

B5638 Bias Binding

I cut the bias neck and armhole binding using the pattern pieces.  But instead of using the their directions for attaching, I decided to use my Simplicity Bias Taper Maker machine and create a nice bias tape.  In the photo above, I attached one side of the bias fabric using the fold created by the tape maker for sewing guide.  I then trim the seam and turned the bias fabric, pinned and then “stitched in the ditch”.  The pattern instructions have to you hand sew the bias binding; not for this girl.

B5638 Armhole bias boundThis is the pinned bias at the armhole.  The pattern has you stitch the bias binding and then turn all of the binding to the inside and then you topstitch.  Their method the bias binding does not show.  I wanted it to as a nice design feature.

B5638 Neckline ruffle and facing

Here is a close up of the neckline and ruffle.  Still hard to see. Perhaps I should have used the contrasting solid color for the ruffle. 

Sorry no photo of me wearing the dress.  I am comfortably dressed for lounging around the house and will have to save the wearing shot for another day.

I hope everyone has/had a nice Father’s Day, no matter how you celebrated.

Sunday, May 23, 2010

Complicating a simple pattern

I have found a way to turn a "quick sew" dress into a more time consuming project.

I decided I wanted to do some sort of embellishment to the waist insert for KS 3760. It was one of those ideas that popped into my mind last weekend and the more I thought about it the more I was convinced I should do this.

My idea was to make pintucks and use that with the waist insert. I made 1/4 inch wide pintucks with 3/4 inch spacing between them. The design idea was to imply stripes.. I am not sure that I actually achieved the true look of stripes but the pintucks were vertical and does give a different look for the waist insert.

I had no idea how time consuming the pintucks would be. I would mark, pin and sew the tucks; repeat; place the pattern on the pintucked fabric to determine how many more rows of pintucks to sew. After completing the pintucks, I then attached underlining fabric. You can see the attached waist inserts below:
I then underlined the front and back skirt pieces and basted to the upper portions of the dress. After basting the side seams, I tried on for fitting purposes. I had to take up the front skirt darts and decided to trim the center back seam in the upper back area as this was going to be too wide in that area after I insert the zipper.

So dress upper and lower pieces are attached. I found two great invisible zippers to use and have to decide to go with the lavender or stay with the beige, the same as the dress background.
I learned from the fitting session that I may need to take deeper seams at the waist area down to hem.

The dress calls for armhole facings which I have cut out and fused with interfacing. I may decide to use bias tape instead. So next steps are:
  1. Insert invisible zipper
  2. Sew side seams
  3. Attach armhole facings or bias tape
  4. Hem

I really like the look of the dress and there is a part of me that wishes I had just eliminated the embellished waist insert. I probably would have a completed dress now. Yet this is why I sew to design and make garments my way! Later.

Sunday, May 16, 2010

KS sewing update

Here is the bodice part of the KS 3760 dress. I love sewing with quality fabric. It makes a lot of difference. Upper left photo shows neckband attached, side seams not sewn yet. Upper right shows the underlining. Middle left shows how I attached the neckband and seams not finished; middle right shows serge finished seam. Bottom photo is a side view in the mirror of the bodice with side seam stitched. I also took a deeper bust seam from upper curve of the princess seam to about an inch above the waist.
Posted by Picasa

Sunday, May 09, 2010

Fabric and Lining


This is the fabric and the lining for KS 3760. Fabric came from Textile Studios. I know that it is over 3 years old.

Kwik Sew 3760

Dress is in progress-it's been cut out. I decided to underline bodice and waist insert. I will line the skirt portion as well. This is a cotton lycra fabric and lining/underlining I think will help control some of the wrinkles. This photo is of the FBA I made. I also made my usual forward shoulder adjustment (FSA) and swayback.

I need to cut out the underlining/lining fabric, set up the machines and get ready to sew.

Sunday, August 16, 2009

McCall's Blouse

Yesterday, we visited my MIL and my DH's cousin in Danville yesterday. We had lunch with MIL and then did some shopping at the local mall.

Upon returning home yesterday evening, I spent time starting on the McCall's blouse, I made pretty good progress with sewing darts in the front and back, serge finishing seams. DH wanted to eat some dinner and watch a movie, so sewing ceased for the evening.

Today I have worked on the blouse some more. I have not made a blouse with a front placket in years. I decided to follow the pattern directions for this up to a point. Once you attach the placket they would have you slip stitch the folded edge over the seam where you attach that part of the placket to the blouse. I always have an issue with this and do not understand why they do not have you stitch in the ditch to secure this. Industrial sewing does not slip stitch. So I stitched in the ditch to secure; much better than any slip stitches I would do.

The blouse base, as I call it, is complete. Next I will attach the collar stand and collar. Attaching stands and collars are again something I have not done in several years.

The fabric I am using is a cotton/lycra from Les Fabrique. It is great to sew on.

More to share later.

Sunday, July 19, 2009

Upper-lower back-2nd view

I like the way the intersecting lower/upper and side back pieces look. Especially with the nice piping corners where the side seams intersect.
I interupted my sleep early this morning working out how this was going to look!!! Actually turned out better than I thought it would.

Lower and upper back attached

The lower and upper back pieces attached to the side back pieces.

Lower bottom View A


Lower bottom View A
Originally uploaded by Danvillegirl
This is the lower back piece for View A. I pressed the center seam over a pressing ham as the piece is somewhat curved and this helps it curve nicely.

Skirt upper back piping at lower edge

I added piping to the bottom edge of the upper back piece. I decided that this was a design idea I needed to incorporate. I felt it would be a design feature and not a "I ran out of piping look". Of course, anyone reading this now knows "the rest of the story".

Skirt upper back piping

This is the upper back piece cut on the fold. I attached piping to this seam. This is when I realized I would not have enough piping to add the the lower back piece.

Skirtfront-piping


Skirtfront-piping
Originally uploaded by Danvillegirl
Here is what I have been working on this weekend. This is the skirt front. I decided to add piping to the front seams of this skirt. I had the perfect matching piping to use.

This is piping I purchased from Wal Mart super store about a year ago when they decided to eliminate their fabric department. I wish I had purchased two or three packs of the various piping packs that I purchased.

August Sewing Simplicity 7295

 I am not doing well as a blogger. I have been working on this project since July 30. Today, I finally finished it. It has been a stop-and-g...