Saturday, December 08, 2018

Bellavista by Itch to Stitch

I finally made this pattern!  I have had it printed for some time and finally taped all the pieces together.  I am normally a "Team Trace" for pdf patterns because I like to pin fit patterns and copy paper does not work well for this fitting technique.  I decided I would go with the finished measurements for size 10 and 12. 

That worked pretty well, however, I think I probably could go with an 8 in shoulder/upper chest area.  ended up shaving off 3/8 inch from shoulder width and I think I could shave off another 1/4 inch.  My back is fairly narrow and with all patterns-indies or Big 4, the back is always too wide or full.  I ended up shaving off a 1/2 inch from each back side seams which makes it about an inch reduction.  This worked well for my back fitting.

I used the size 10 for upper chest and shoulder tapering to size 12 from underarm to bottom. I think I that worked well for bust area and after reducing the back piece as noted above, the fit was good for that area.

My DH helped with taking pictures but I did not like how they turned out so I took the bathroom mirror photos.  Not the best photos but better than what he took.

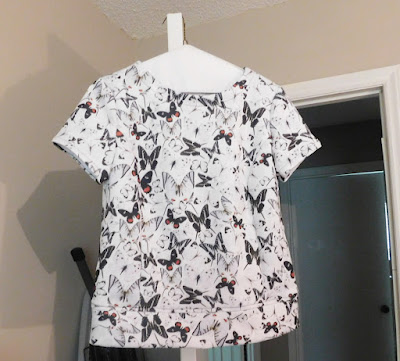
Here is a side view with a comment.

What drew me to this top originally was the cowl neck.  When I started with this fabric, I thought I had enough to make the cowl neck. Unfortunately, I did not!   So I used the view with neckband.  I have used a neckband attachment method that I saw on Threads Insider years ago and it has served me well most of the time.  As you can see in the above I have gaping at the center neckline. I reduced the length of the neckband and added width before attaching.  I basted it first and decided I did not need as much width and reduced that by 1/4 inch.  I think the gaping is more of a fabric issue than the pattern.  I also think if I had kept it at its original width it would have been better.

Other than tweaking the size a little, I really like this pattern.  You can not see the front seaming with this busy floral print.  It is a nice design feature and does allow for tweaking if you find it too full.  I think you could also do some creative seaming with this as well as color block with the centerpiece.

I like the bell sleeves. I think the sleeves are a little full in the bicep area and might reduce that fullness with the next top.  I have pulled out a solid knit fabric from stash and will measure to make sure I can cut out the cowl neck before cutting into the fabric.  Or back to the stash I go.

For full disclosure, I am an affiliate of Itch to Stitch and if you think you would like to try this pattern, you can click on the link in the left-hand column which will take you to the site for purchasing. I would receive a commission.  My opinion about this pattern is my own.


Isn't It IRONic !

I started a post last week to talk about irons and how I truly love  loved my Reliable Iron

that I purchased July 2017 from Amazon.  $169 is pretty steep yet I had seen it in use and decided I could afford it.

I really did like this iron as the steam feature is excellent.  It has an auto shut off feature that you can override as well, which I did when I was sewing.

Then Sunday, I was pressing some seams and the iron began to make a strange sound, similar to the sound it makes when the water reservoir is almost empty.  Yet this was not empty. I picked it up and the sound stopped and I set it back down.

I then went to my serger to sew and a light placed near my serger began to flicker as did the overhead light.  That was strange.  Then my iron started flashing the steam LED lights and making a noise.  I turned off the iron and the lights stopped flashing.  The iron is plugged into a wall that is not near my sewing or serger machines so I did not think it was a circuit overload.

I waited a little bit and then turned the iron on again and the loud sound and the steam lights were both flashing.  I cut it off again.  I then carried the iron to another area in the house and plugged it in and noise and flashing occurred again.

I did not know about any warranties with the iron and when you sew you need an iron.  With no backup, I decided that I would have to replace the iron.  I looked on Amazon and yes their shipping is quick but not quick enough.  I then looked at irons on Bed, Bath and Beyond website and decided a Rowenta iron was one I would try.  The next day I went to BBB and purchased the Rowenta Pro Master Excel and using a 20% off coupon I was able to purchase for less than $100.

There are some differences of course compared to the Reliable iron.  To steam a garment you have to push the steam button, the Reliable starts steaming either light or heavy depending on the feature you selected as soon as you pick up the iron.  There was no spray feature with the Reliable but the Rowenta has one.  It takes tap water as did the other iron and I like the point on the sole plate of the Rowenta better as you can get into small and tight places with that point.

I had a different Rowenta Steam system previously that lasted several years and loved it.  When it gave out then I went with the Reliable.  I have seen both positive and negative comments about Rowenta irons.  My experience was positive previously and hoping it will be again with this one.

I am glad I did not finish and post the previously planned post about how I was continuing to love my Reliable Iron.  Perhaps that was an omen!

Next up a review of the Itch to Stitch Bellavista Top pattern. (Affiliate).


Thursday, November 29, 2018

Itch to Stitch

My next project is the Bellavista Pattern from Itch to Stitch.  (I am an affiliate and link in left column. I would receive a commission if you used that link.)

I printed this pattern months ago, actually prior to our relocating to NC.  I decided with our cooler weather this would be the time to actually tape the pages together.  I like the layered printing that is provided with Itch to Stitch patterns and I only needed to print two sizes to accommodate my measurements.

I like the cowl neck look with this pattern as well as a somewhat swing shape to the overall look of the top. I wish I had similar knit fabric as shown in the picture below.
I am going to use a black/pink/coral rayon knit from Simply By Ti. (I am not an affiliate)

Next steps are to trace the pattern onto Swedish tracing paper for pin fitting.  Then after any adjustments cut out the fabric. 


Wednesday, November 28, 2018

Back home!

For all of you who celebrated Thanksgiving, I hope you enjoyed that time.  DH and I traveled to our hometown of Danville, VA to visit DH's sister and her immediate family members.  We also got to visit with some longtime friends as well.  It was a very great visit and it is always nice that as longtime friends, you can pick up the conversation from where you last left off, even if it was a few months or a couple of years ago.

No sewing during this holiday.  I am now ready to get back to sewing some clothes for fall/winter.  I just need to decide which ones.

I did take advantage of Black Friday and Cyber Monday deals.  I purchased this new book on Amazon from Named patterns. ( I am an Amazon Affiliate and there is a link in the left column to order yours.  If you do, I may receive a commission. Being transparent here.)
The book includes several patterns uniquely packaged at the back of the book.
I have not had time to really look through the book.  It was delivered yesterday and hope to look at it more this evening.

Off to pull patterns and fabrics.  More later!

Sunday, November 18, 2018

Vogue 1522

I just finished V1522 a designer pattern by Isaac Mizrahi.  I bought this pattern in 2016.  This was to be my second entry in the Pattern Stash contest on PR.  I knew that I had to chance of winning by making the most garments from patterns in my stash purchased prior to 4/2018.  So I did not knock myself out to complete this top by the deadline.

This was an easy pattern to make.  I did not follow the instructions all the way but did review them as I went along.

Some differences were how I did the binding for the neckline as well as completing doing the sleeves differently.  Instead of using the fabric for binding the neckline, though I did cut out the fabric to do so; I used bias tape instead.

My reason for doing so is that the bias fabric neckband was much longer than the circumference of the neckline.  I seem to have that issue with a lot of patterns for woven necklines.  I could have fixed this but decided to use bias binding that would be easy peasy to sew and finish the neckline.

The sleeve flounce is a single layer with a tiny hem and I decided to cut four flounce pieces and have the flounce encased so wrong side would not show.  I also used a sleeve lining method I learned many years ago from Nancy Zieman.  You can see the underside of the flounce below:

I plan to do another post detailing this technique.

After returning from grocery shopping, I was able to set up tripod and camera to take some shots of the top.


I like the fit of the top and had to make some fitting adjustments.  I narrowed the shoulder by 3/8 inch and used a size small for that area.  I added 1 1/2 inches to the bust and kept the dart that was created.  It is difficult to see with this busy print. I made 5/8 swayback adjustment and shortened the sleeves by one inch.

I have sewn other designer patterns that were very difficult and this was not at all.  A beginner I think could easily tackle sewing this top.

I will make another version another time.  Now I want to focus on sewing a couple of cardis and cold weather tops!

More later.


Pattern Reviews 12 Days of Thanksgiving

For a few years now, Pattern Review conducts a 12 Days of Thanksgiving.  This is a time when you can thank various reviewers for what they have provided to you and other sewists by posting on the PR Blog.  I was so thrilled when it was announced that I was the Day 1 Winner!

And even more exciting was that I won fabric from Emma One Sock!!!!!
I just received the fabric yesterday and was so excited to see what Linda Podietz selected for the winner. Of course, if you have purchased fabric from EOS you know that it is top quality and always packaged and shipped promptly.

I was thrilled with the selection, 2 yards of rayon knit!!!


I just had to share this with my sewing friends!


Saturday, November 17, 2018

Comments

Once again I find that I will have to initiate comment moderating.  With my last posting, someone left five comments in a language I do not understand nor can read.  It appeared to me to be the same comment over and over. I know that I do not know this person.

I truly appreciate your comments and do try to respond to them most of the time pretty quickly.  This requires me to take more steps; nonetheless, I am willing to do so to keep my blog somewhat protected.

I have to hem my top that I am working on and will share some photos soon. Thanks for stopping by and I will update the results of this new top shortly.


Thursday, November 15, 2018

Progress

I am currently sewing V1522, Isacc Mizrahi designer pattern.  I am making the top.

It has been a fairly easy top to sew, though I am deviating from some of the steps at the neckline and the sleeves.  I will share more about this later.

The fabric I am using is rayon challis from Fabric Mart purchased in 2015.
I found it very difficult to mark the dart on the wrong side of the fabric.  Perhaps because this is a busy print, the wax tracing paper, no matter the color, would hardly show up.  I finally got the darts marked with clipping and marking an endpoint for the dart with marking pen.  The other challenge was to make sure the darts were in the right place on both sides.  I forget that rayon challis can be a slippery fabric to work with.  I prevailed.

The dart is a result of needing an FBA of 1.5 inches.  I am very close to finishing this top; hopefully today.  I have a lot of things on my To Do list for today.

The weather has turned dreary, cooler and wet.  This is getting me in the mood to make a cardigan.  I have several I want to try. More updates will follow.


Saturday, November 10, 2018

Is it just me?

This is a quick post.  Lately, when I visit the McCall's/Butterick/Vogue website it takes forever for pages to load.  This just started in the past month or so.  I thought it was my computer.  I did a speed test and that proved that it was not my computer.

I cleaned out my "cookies" and optimize my computer and still have issues.  I was just wondering if others are experiencing this.  I sent an email to McCall's yesterday and have not had a response.  I also saw on their site that some of the McCall's patterns were not listed at $3.99 per their sale notice.  I actually want to buy a couple of patterns.

I appreciate your feedback.  I have not tried it today yet and will later. Right now I am getting ready to make breakfast.  Look forward to your comments.


Wednesday, November 07, 2018

Wearing the Austin Tee

I truly love this pattern!  I am not sure why I waited so long to try it. Now that I have, there will be more.

I purchased this pattern in 2017.  I liked the look of the tee and the variations offered.   Because of the Pattern Stash contest on Pattern Review, I was motivated to try it.  So glad I did.

It is a well-drafted pattern.  The challenge for me was what size to use.  I am so used to indie patterns running large on me in the upper chest area, so I started with a medium.  After pin fitting this, I knew it was going to be too small.  The instructions say to decide your size based on upper bust measurement, which put me in a large. Again I thought that would be too large as I normally go with medium or 12/14 in Big 4.  Come to find out that it was the right size.

I made a 1 1/2 inch FBA and tried a different method that I normally do which did not work so well and made the shoulder width to wide.  So I retraced the front pattern piece and used my usual method.   Other adjustments were swayback and trimming the armscye area to a medium.  I also added length to the tie piece as sometimes they are too short.  I think I may have overdone this.

The tie is shown in the middle of the top and instructions say to put it where you want it, so I moved it more to the side than keeping in the front, maybe next time I will put it there.

My only tweak to the finished pattern is that I will shave off about 3/8 to 1/2 inch on the shoulder width next time.

Without further ado, pictures of me wearing this with shorts yesterday.  Our temperatures were in the upper 70's again, perfect for voting weather. I ended up not wearing the top as the long sleeves would have been to warm for me yesterday.


The fabric is so soft and buttery.  Washes great and no pilling. 

Next up is a Vogue 1522; I am making the top from this pattern.

Monday, November 05, 2018

Austin Tee

I completed the Blank Slate Pattern-Austin Tee.  I am very impressed with the drafting of this pattern as well as the instructions.  I did not use the Simply By Ti fabric that I had originally planned to use. I decided to use this fabric from Cali Fabrics.

I love the quality of this fabric and how it feels.  I previously used it for this project.

Since I had not tried this pattern or any other Blank Slate patterns ( I own several), I was unsure of the measurement information.  After taping the pieces together and tracing a too small pattern, I retraced the large size and achieved a great fit.  Pictures wearing will follow in another post. I decided that if this did not work out well, then I had already gotten my money's worth using this fabric from stash.

As I stated earlier, this is a well-drafted pattern with very good instructions.  I will make another one in the future. Here is a quick view of the top and the top tie.


I will post pictures of me wearing and provide more details later.

August Sewing Simplicity 7295

 I am not doing well as a blogger. I have been working on this project since July 30. Today, I finally finished it. It has been a stop-and-g...