Thursday, June 30, 2016

Cold Shoulder

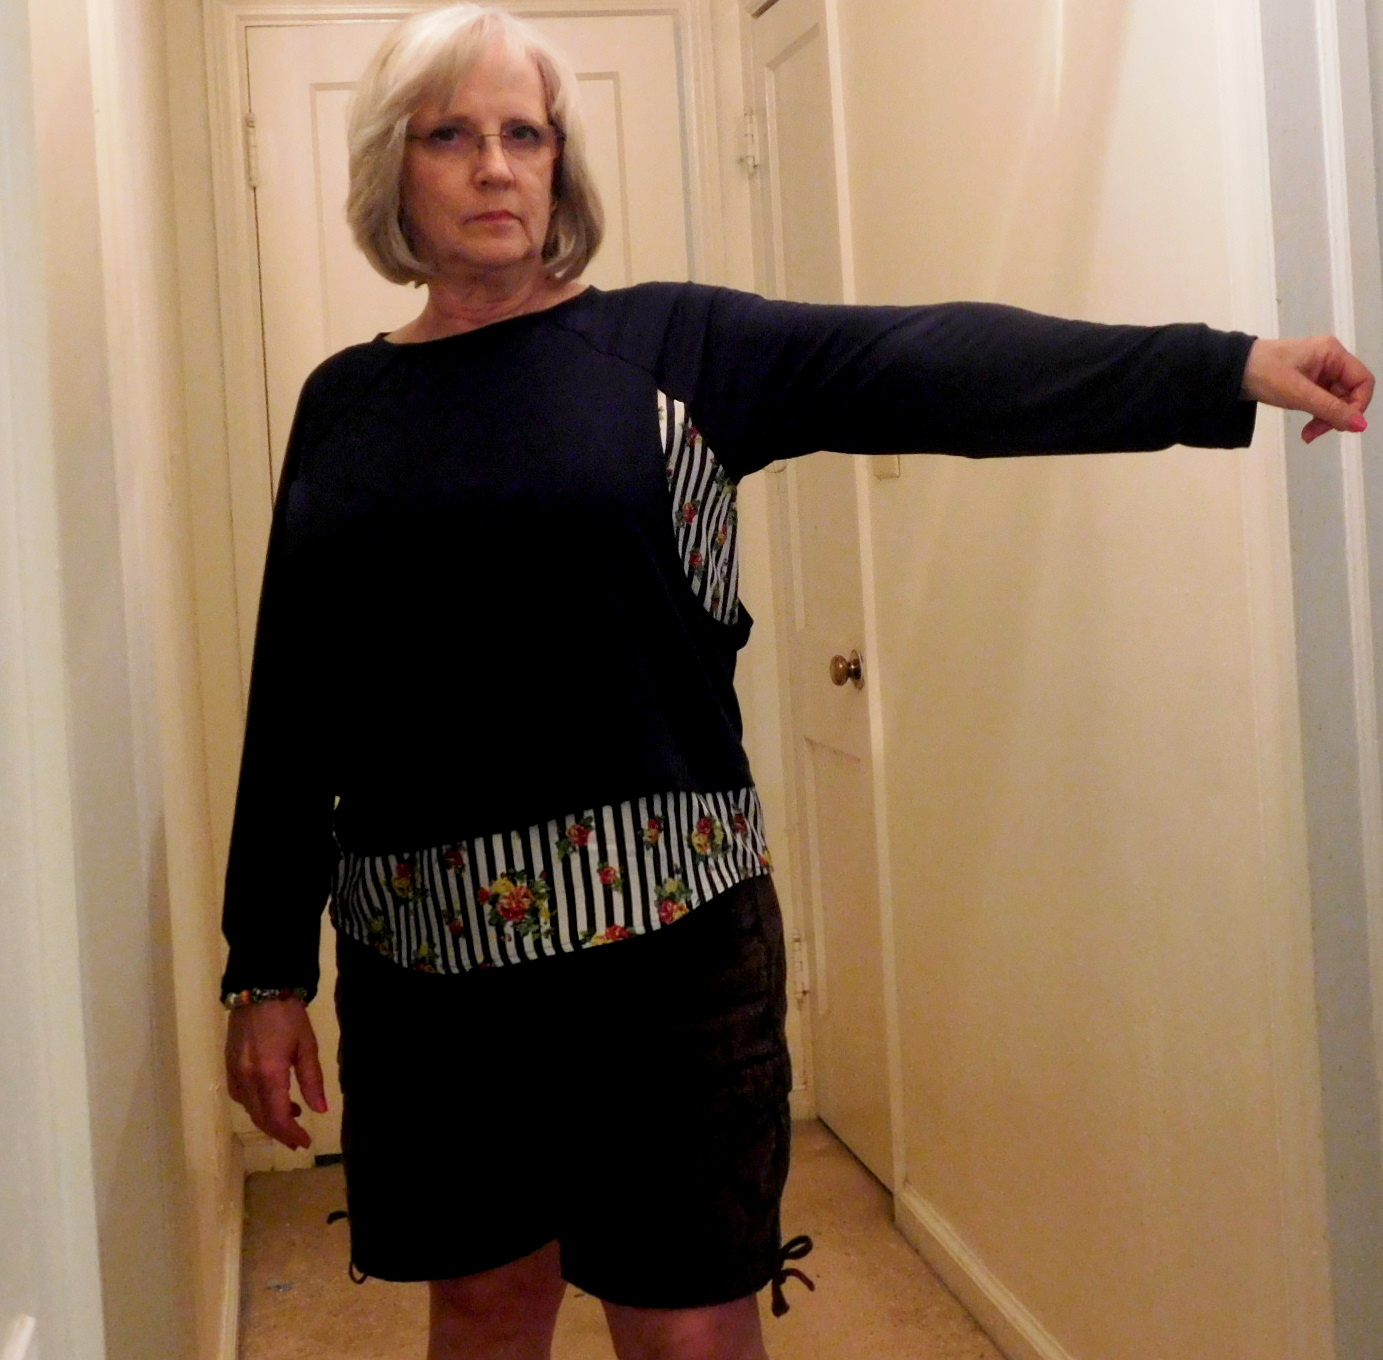
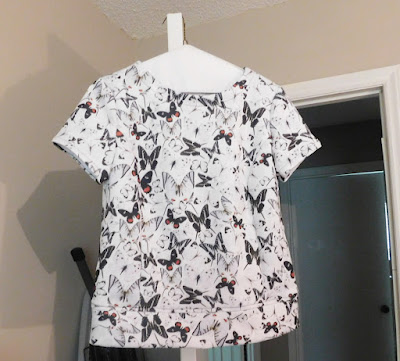
Simplicity 1363 is complete!  Finally!

I really like this top and wore it yesterday with pants and open toe shoes to work. The top felt good while wearing and the fabric was perfect for hot summer day, yet cool in the office. Hardly any wrinkles.

I took pictures Tuesday evening of the top and it looked good with shorts as something casual, it looked business casual for work though our work place attire is very formal.  With planning discussion with staff from two mission related programs, this was perfect for brainstorming, no suits or panty hose needed.   A certain someone in the agency may think otherwise.

I digress--here are shots of the top.


A few notes about this pattern that you may want to consider if you decide to make this.

  • Pattern has lots of ease.  I normally use size 14-16 in Vogue and Butterick patterns. For this one I used small for neck, upper chest, shoulder.  Transitioned to medium for bust to bottom.
  • I did not do a FBA-yeah-because of the ease.  There are princess seams for the front so adjusting there would be easy.  I did take in an additional 1/2 inch from under the bust to waist for the front.
  • The back is long and I cut off about an inch on the back band piece from the center and tapering off to the original cutting line at side seam.
  • I made a 3/4 inch swayback adjustment to the back and ended up taking the center back seam deeper going from 5/8 to 3/4 seam.
  • I did not make a forward shoulder adjustment but will next time and will cut off about 1/2 inch from shoulder length as I think that the shoulder/ sleeve opening does not reveal the top of the should as most "cold shoulder" patterns do.
  • I eliminated the opening in the back, only after sewing neckband and attaching loop to button. I had gaping in that area and decided I could sew this up all the way as I could easily pull this over my head.  That was a lot of frog sewing to fix this.
  • I stabilized the arm/shoulder opening before stitching the hem for this area.  Instructions did not call for this.  I thought fabric needed it.
  • For the bodice hem, I used a rolled hem on my serger for this.  I trimmed another 1/2 inch off the center back band tapering to nothing at side seams; the top still seemed long in the back after my initial trimming.  If I make this again, I will reduce that back band center area before stitching.
That's it for now.  Washed some fabric last night for upcoming sewing for the holiday weekend. More later.

Saturday, June 25, 2016

Patterns Recently Purchased and Sewing Progress

I mentioned in a previous post that I took advantage of McCall's and Simplicity pattern sale. I finally got around to taking some pictures of the patterns.

Here are some pictures of the patterns:


Today I have been working on completing the Simplicity top. I had to make some fitting adjustments after I had basted the side seams and the shoulders. The top is rather full and based on the finished bust and hip measurements I did not have to make any fitting adjustments in those areas.

I ended up taking deeper underarm seams and this is sometimes necessary with this type of type sleeve. I took a deeper seam right under the bust curve and ended up taking deeper back seam as well.

I used a small size in the neckline, shoulder and upper chest area. I ended up with a gap at the back neck closing. I had to make an adjustment in that area which resulted in the elimination of the back opening as I could easily pull the top over my head without a button and loop closure.

I only have to hem the bodice of the top and I will finally be finished with this pattern. I like the outcome, it has just taken be more time to sew this than I anticipated.

I hope your sewing weekend has been productive.

Sunday, June 19, 2016

Some progress

The weather has been great this weekend and that means DH and I are out and about.  So sewing has been sparse and sporadic.

The neckband is attached to the Simplicity top.  I had some issues with this as the directions say one thing but illustrations show something else. I chose to follow the illustrations and ended up with neckband facing on the right side and neckband on the inside.  Not a big issue except I had trimmed and notched the seams before discovering the error.  It was solvable, though added a few more steps to a simple project.

I had to stop at JoAnn's to get a tube turner while we were out  as I have no idea where my current one is located.  Shame on me for a messing and cluttered sewing room.  Normally when I buy a replacement I end up finding the one that was "lost".  So far it has not shown up!

Simplicity, McCall's and Vogue patterns were on sale and I tried hard to walk away without looking but several patterns on my wishlist captured my attention and for $1.99 or 3 for $5, what's a sewist to do.

Updates on current project and patterns purchased to be posted later.

Sunday, June 12, 2016

Sewing progress-Simplicity 1363

Yesterday and today were bright summery days with temps in the low 90's. DH did some shopping chores for us yesterday AM which gave me time to cut out the fabric for my new top-S1363.

I made some adjustments to the pattern.  With this pattern there was two side front pieces with xxs-s sizes on one piece and the other piece was for m-xxl.  Simplicity patterns seem to run large in the upper chest/shoulder/neck areas on me so I decide I would cut a small in those areas transitioning to medium from the bust down.  For the front I overlaid the xxs-s over the medium size for the front pattern piece and taped them together, as you can see here.

I lined up the straight of grain arrows and aligned the medium for the sleeve and bust area to provide the extra width I needed.  Normally with kimono sleeves like this I end up taking a deeper seam in the under arm area, so I made find the small to work better.  Better to have more to take deeper seam than less and have tightness.

I was able to sew the front piece before going out to dinner Saturday.  This morning I sewed the back pieces together with the back lower band.  I did make a 3/4 inch swayback adjustment and cut about 1/2 inch off the center part of the back band tapering to nothing near the side seam.  I know from the finished measurements for the back from waist to hem that this was going to be longer than I wanted.

I sewed the front to back at shoulders and began fusing interfacing to the neckband before stopping as DH and I planned to go out this afternoon to spend time doing some outdoors activities, just to pretty to stay in all day.  Here is the front and back on AlmaMarie

Back with back band attached.

Front view


I love this fabric!  Very light weight, yet not to fiddly to cut out or sew.  This I purchased from EOS in 2014.

Will share more as sewing progresses.

Friday, June 10, 2016

TGIF

This has been a heck of week.  So happy that it is now Friday.

My pattern is almost adjusted and plan to cut out the fabric shortly.  Looking forward to sewing time this weekend.

I hope your sewing plans are fulfilled this weekend also.  Catch up with you later.


Tuesday, June 07, 2016

Stash Shopping

The fabric I wrote about in my last post is now going to become something else.  After stash shopping I found another similar weight/texture fabric that the red matched well with the red in the print fabric. Yet it just was not speaking to me to use together.

Another blogger suggested using lace, which I did not have in a color that would go with the print.  So I decided to move onto another pattern. Working my way through my top/blouse patterns, I found this one.

I decided to try the cold shoulder look and will make the view of the floral print. This I think will be a good marriage with the print fabric and pattern.  I need to make a few adjustments to the pattern and hope to cut out the fabric later this week.

More sewing updates later.

Thursday, June 02, 2016

Next Project

I want to make McCall's 7359 next.  I am browsing through my fabric collection to see if I can find something from it. One fabric I keep coming back to is one I purchased from EmmaOneSock, February 2014.
This is a rayon-viscose.  I wanted to make a top with contrasting fabric for bodice and yoke.  Just not finding the right color or texture to go with this fabric.  I am continuing to search through stash for other contrasting fabrics that I may use instead.


Sunday, May 29, 2016

Paulina Top

I completed the Paulina Top and I am pleased with the outcome!

This is PDF pattern that you print out.  The nice thing about this pattern is that it uses layer printing so you only print the size(s) you need.  For me with this pattern I printed the 10-12-14 sizes.  Once I print and tape all the pieces together, I then trace the pattern pieces onto Swedish Tracing paper and then pin fit the pattern.

This time around I took the necessary time to determine the correct sizes I needed instead of just printing a size 14 and going for it.  Results were not good.

I used a a size 10 for neckline and upper chest area, then graded to size 14 for bust to waist area, then back to 12 and using the shortest length.  After pin fitting, I added an inch to the bust area in the front only using pivot and slide method.  It was important to add the inch as the woven fabric underneath the cropped bodice needs to fit well.  I used the added inch for the cropped bodice also and probably did not need to do so as the knit is more giving and I had to take a deeper side seam because of the fabric gaping.  I still have some gaping and will remove this for future tops.  I am going back on this one and take it in some more.

I made my usual swayback adjustment of 3/4 inch and added an inch to the neckline as this is a wide neckline, this is my personal preference.  The sleeves are very long and the bicep area very full.  I shortened the sleeves 2 inches and took a deeper seam than the 3/8 seam allowance.  I also took in about 1/2 inch at the front and back neckline as I had some gaping there.  The neckline is finished with bias band or bias tape.  I decided to use bias tape in blue.

The fabrics used came from two sources, the navy blue knit is from Fabric Mart and the woven floral stripe is a rayon fabric from The Fabric Market.  I love this fabric and considering buying more if still in stock.  Lovely and easy to sew.

Here are some other views of the top.  Excuse my faded look, I have had a viral infection that has stayed with me for about three weeks.  I am on the mend but there is a horrible cough associated with this virus and I am prone to bronchitis so have coughed and coughed for days.
Sleeve fullness and cut out under the armhole

Back view

Front view

Semi side view

Woven underlay


When I started the project before getting ill, we were still have cooler temps and I thought I could get some wear out of this before temps rose.  I still might.  Yesterday it was 80 degrees and this would have felt hot while outside.  

I can see another one of this for fall.  

I am a Itch to Stitch Affiliate and wanted to give full disclosure about that.  My review of the pattern is my personal experience with it.  There is a link on the sidebar if you have an interest in purchasing this or any other Itch to Stitch pattern.


Saturday, May 28, 2016

Almost there!

I have been busy sewing over the Memorial holiday and the Paulina Top is almost complete and ready to reveal.  I like it!!!!

More later :-)


Sunday, May 22, 2016

Paulina Top

I started working on the Itch to Stitch Paulina Top yesterday.
I attempted this one once before and the outcome was not good.  It was not the pattern it was me.  One I chose the wrong size and never really tested it by pin fitting or making a muslin.  I put it aside for awhile.

 I like the look of this top for something casual and one thing that I need more of is tops for casual as well as for work.  I have some tops that I have been wearing forever and the knit is started to peel or fade. 

I decided to stick with blue fabrics since serger is threaded with blue thread and this fabric from
The Fabric Market has been calling out for my attention.

The blue knit fabric is from Fabric Mart.
This is where I left off yesterday morning with the blue knit overlay completed and then basted to neck and sleeve front.
The blue looks lighter in the picture above but it is truly a navy knit that has been in my stash or at least two years if not longer.

I have made a lot more progress since yesterday morning and will post more later.

Let me say I pin fitted the pattern last week and determined that I needed to sew a 10-12.  I made some of my usual tweaks-swayback, raised neckline an inch, reduced the length of the sleeves as well as the width.  I also made a one inch FBA using pivot and slide method.

More later.


Tuesday, May 17, 2016

May Garment of the Month

I decided to make Simplicity 1063
At first I was going to use both fabrics shown above.  In the end I decided that I had enough of the royal blue fabric to make View A, the red top, and would not use the floral print.

I like this pattern and I will make another View A top. I had to make some pattern adjustments and I still have an adjustment to make with the back. I made a FBA of one inch, using pivot and slide method but only adding to the front piece. I also made a 5/8 upper round back adjustment, 5/8 FSA and 3/4 inch swayback adjustment.

I still had some pooling at the back waist and had some fabric hanging up on my hip.  The back has an overlay that drapes and pleats which I liked so hopefully the other issues were not so noticeable when I wore this to work yesterday.  I did not notice this myself until I took pictures last night after work.  

I raised the front neckline has I thought this would be too low on me and for my wearing comfort this worked well.  I raised the v neck about an inch. 

Here is a little better picture of the back drape

I did not add the tab to the sleeve, my sewing machine was not liking the fabric to sew a buttonhole. I ended up cutting off about 3 inches, making the sleeves 3/4 length.

Final shot is a view of the side
The back overlay is basted at the yoke and side seam  and then stitched when sewing the side seam.  The instructions have you sew the sleeves in the round.  I sewed them flat then stitched the side seams from bottom of the top to the bottom of the sleeve.

The neckline has a facing and then topstitched an inch from neckline edge.

I like this top and do plan to make another, maybe with short sleeves and contrasting back overlay.  I truly got my money's worth with this royal blue knit fabric from Fabric Mart.  This is the second top made using this fabric.  Nothing but scraps left now!

Next project-Itch to Stitch Paulina top.  

August Sewing Simplicity 7295

 I am not doing well as a blogger. I have been working on this project since July 30. Today, I finally finished it. It has been a stop-and-g...