I normally do not sew a muslin. Most of the time I use a pin and fit method as described in the book "Fit for Real People". Perhaps instinct kicked in for this particular top and I decided to test the fit using similar knit fabric that I want to use when making the real garment. I am glad I decided to do that.
I used a knit that has been in my stash for awhile and was left over from another project that did not go so well. I traced the sizes I used for the Penny Pinafore dress pattern. I then cut out the test knit fabric and quickly serged the top. There were a few fitting concerns.
1. The sleeves were too long for a cap sleeve on me; I failed to shorten the sleeve in the shoulder area. I pinned that out on the test garment and made the fit better.
2. I took a horizontal tuck in the upper chest and upper back to go with the shortened sleeve.
3. I made my usual sway back adjustment with the pattern before cutting out the fabric and found I still needed to take out another 3/8 of an inch in the back area above the waist.
4. The bust area was a little snug and decided to make a FBA of 1 inch.
5. I also made an adjustment at the hip using a fitting adjustment from a Craftsy video produced by Lynda Maynard. This was about an inch adjustment.
After making these adjustments on the pattern pieces, I had enough fabric left to cut out a new bodice front and back. I cut the sleeves from another solid knit fabric. The neckband that I cut previously will still work with this test Tribeca Top. Hopefully I can test the fit of that tomorrow.
Showing posts with label test garment. Show all posts
Showing posts with label test garment. Show all posts
Tuesday, August 19, 2014

Sunday, February 24, 2013
Testing was a good thing
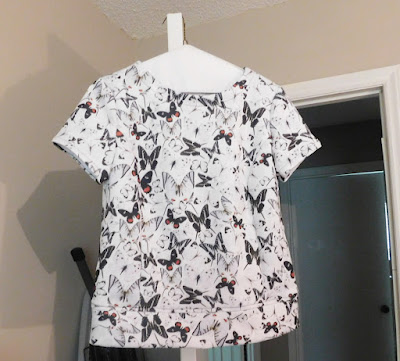
 Here is my test garment. It was too tight through waist and hips. Shoulder to underarm area was too long. Neckline a little low before adding the neckband which I did not do as there were enough fitting adjustments needed for the bodice and sleeves.
The length of this top was too long even if I was going to wear it as a tunic and evening then it was just too tight to go over jeans well.

The adjustments I ended up making before I cut out the originally planned fabric were:
- Raise neckline an inch. This created a challenge to raise the sleeve top by the same inch but it came out well.
- Cut off two inches from the length.
- Take a 3/8 horizontal tuck in the front and back bodice pieces and adjust sleeve by the same amount.
- Add 1/2 inches to front and back from under the bust, which fit well, to the bottom.
- Make my usual swayback adjustment which I failed to do when cutting out the test garment.
- Adjust markings on the sleeves to allow for added inch at the shoulder point area for front and back so gathers will be sewn appropriately.
I hope your sewing weekend was a good one.
Subscribe to:
Posts (Atom)
August Sewing Simplicity 7295
I am not doing well as a blogger. I have been working on this project since July 30. Today, I finally finished it. It has been a stop-and-g...
-
 I am not doing well as a blogger. I have been working on this project since July 30. Today, I finally finished it. It has been a stop-and-g...
 -
 On to the next project. I made this pattern previously. I made View C. I wear the top frequently though I feel it is a little large on me....