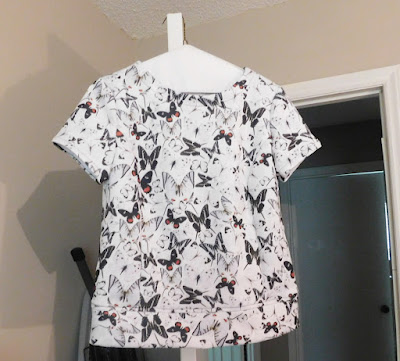
ADJUSTMENTS AND CUTTING
Adjustments made were:- FSA of 5/8
- FBA of 1 1/2 inches
- Narrow upper back adjustment of 3/8 inches
- High round back adjustment of 5/8 inches
- Shortened the length by 2 inches
- Swayback adjustment of 5/8 inches
 |
| One front piece adjustment |
 |
| Back taped together after adjustments |
I also had to make the same adjustments to the front bands to align with front pieces.
I then went into a sewist block and then I finally got around to cutting the fabric, once I was able to determine the layout for the design. The fabric was in my stash for a couple of years and I think I purchased from Fabric Mart. I know that when I received the fabric it was not what I was expecting and stashed it away for later use. I almost gave it away when we were preparing to move last year.
I still was not in the mood to sew and the project sat for a while. I read a review on Pattern Review of the same version I was making and that gave me the push to start to sew.
I decided to follow the instructions after attaching the shoulder and side seams. They called for hemming the shirt all around before attaching the front band. Alarm bells went off as I have used this method before and had a hell of a time attaching bands and turning the bottom band edges to match the now hemmed front. This was years ago and I have more experience now, I can do this. NOT! The front band pieces were too short IMHO as it did not give me much fabric to turn under. This was what the alarm bells were telling me to begin with.
So I removed these and cut new ones. I had to cut new interfacing as well. I cut the second pair longer and still had a hard time following the written instructions as well as the drawing. In the end, I attached stopping a little above the front hemlines, folded in the edges and stitched across the band bottoms matching my stitching with the hem stitches.
SEWING AND ISSUES-PART ONE
The darts were sewn first. I serged all side seams of the fronts, back, and shoulders. I basted the side seams after sewing the shoulders and realized that dart length was too long; and that the FBA I made was just a tad too little. Side seams from underarm through bust to the waist were to be 3/8 inch instead of 5/8. Shortening the dart gave me a little more room. BUT, one dart gave me an issue with my adjustment and I made several attempts to fix and it still is not perfect but good enough.I decided to follow the instructions after attaching the shoulder and side seams. They called for hemming the shirt all around before attaching the front band. Alarm bells went off as I have used this method before and had a hell of a time attaching bands and turning the bottom band edges to match the now hemmed front. This was years ago and I have more experience now, I can do this. NOT! The front band pieces were too short IMHO as it did not give me much fabric to turn under. This was what the alarm bells were telling me to begin with.
So I removed these and cut new ones. I had to cut new interfacing as well. I cut the second pair longer and still had a hard time following the written instructions as well as the drawing. In the end, I attached stopping a little above the front hemlines, folded in the edges and stitched across the band bottoms matching my stitching with the hem stitches.
 |
| Front hem before front bands attached. |
 |
| Front band attached, not pressed in this picture |
Next step is to fuse interfacing to one collar and one collar band. I followed the instructions to sew the collar band and collar to the neckline using what is a traditional method. Of course, it did not turn out well giving me my usual poor looking collar with collar band. I removed some stitches and tried again, no bueno! So I removed this and recut new collar bands and new collar, plus more interfacing. Lucky me that I had a lot of this fabric. Before I started attaching the new bands and collars, I remembered the easier technique I used on my Closet Case shirtdress from last year. I went to the website and printed out the instructions. This worked beautifully and I strongly recommend trying this method. I will be using this going forward.
I will stop now and will post the final sewing steps in my next post.


Way to keep going with this one! I am with you on the instructions on some of these patterns. I am working on a button placket top right now, and the instructions for the Closet Case Kalle were SO MUCH BETTER. I should have looked at those instructions, but no, I am over here hand sewing...LOL! Just so you know I am in the same boat!
ReplyDeleteWHEW! It does get tough when something we want so badly to sew gives us fits. It is looking really good. Hopefully you'll wrap it up soon!
ReplyDelete