SEWING AND ISSUES PART 2
The next step was to insert the sleeves. I was truly proud that I was able to cut the sleeves with matching design borders. The first sleeve went in okay with one slight pucker and I removed some stitches and easily fixed.
The second sleeve gave me heartburn. I could not insert that sleeve without getting puckers at the shoulder area. I cut the sleeves separately to make sure the border matched for each sleeve. Perhaps the second sleeve was a little off. I placed the pattern on top of this and found it was cut correctly. I removed the stitching and resewed the basting stitches to be able to create ease for the sleeve. I then inserted again and sewed. I ended up catching some sleeve fabric in the same area thus creating another issue. I had to remove those stitches to release some of the sleeve fabric that was not supposed to be there. In doing so, I ended up removing some of the basting creating yet another issue for appropriate insertion. Restitched basting and adjusted to hopefully get the sleeve right. I had a teeny tiny small tuck that I left as it is not that noticeable because of the fabric design. (Sorry no pictures of this)!
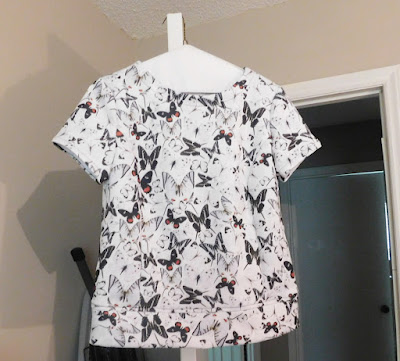
I then serged the sleeve hem edge, turned up the hem and topstitched in place.
 |
| Hemmed sleeve |
I proceeded to attach four more. I had an issue with one of those and had to remove and replace.
Next, I had to attach the underside of the snaps to the other front band. I attached two and wanted to make sure that they were aligning with the top part on the other front. They did, BUT, there was an issue as the second snap outer part had not sealed correctly. This required me to remove it. AND THEN, I found that I did not have another one as the prongs on others were smashed and per the website, you need to throw away because it just will not work. This is true and I hoped to prove them wrong.
I decided to order new ones that were black metal but I am now concerned that these may not match. There was also a sampler of all the painted, metal and pearl snaps so I ordered that hoping that one of metal sample ones will work, i.e. closer match in color, in case.
Thus I am now waiting for my order; I got an email this morning saying that my order had shipped.
Not sure what the outcome will be. I am moving on to the next project until the snaps come in. The shirt is still in the wasn't category.
Closing comments: All of this was sewing errors on my part. Actually, the pattern is not the issue and it is well drafted with good instructions; except I like the collar attachment I used instead of theirs. I also will not hem the shirt first again, I will wait until the front bands are attached and hem at the same time.
I will post the final outcome after the snaps arrive!


No comments:
Post a Comment