Showing posts with label Learning. Show all posts

Monday, February 04, 2008

Success and finish line is around the corner!

Yesterday I worked on the dress and I made some real headway on this. Here are some things that I learned from making this simple turned difficult dress:

  1. Listen to yourself when you say, this may need adjusting. Make sure if it does or not. My shoulders are no longer the broad shoulders they were when I was younger and more athletic. I am petite/short, so are my shoulders. Drop shoulders on me may need to be shortened. I thought this, know this but did not listen to myself.
  2. Make the adjustments on the pattern and if you use the FFRP fitting method, repin again and test the adjustment to determine if that was what you needed to do. Then when you cut out the fabric, you don't have to figure out how to adjust. I know I can hear some of you saying, make a muslin, that's even better. I don't disagree but if I did that I would be sewing two months to make a garment. Pin fitting works for me if I use the method correctly.
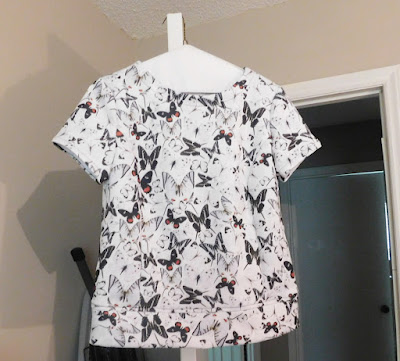
  3. I can make adjustments when I have sewn a lot of the garment and it is close to being finished. With this dress, I ended up having to undo the lining to the sleeves. This was due in part to the style of the dress and the sleeves not being the normal curved sleeveless type but ones that come to a V and require some extra seaming steps. I ended up taking deeper side seams in the upper bodice piece which hits right at the bust area. This adjustment led to turning in a deeper hem on cap sleeve which in turn shortened the drop shoulder and made for a better fit.
  4. I learned that when you change the pattern and add a lining that some of the sewing steps must be modified also. I learned from all the changes that I made that if I should make this dress again I will tackle the lining differently. The pattern calls for a lined yoked but not the rest of the dress. Next time I will line the yoke and bodice/bottom seperately. This will work best for this dress.
  5. I now know that I can think through processes and discover a solution. In years past, I would hit that wall, worry over things, then quit the project. I refused to give up on this and I am glad I did.
  6. Striving for quality instead of quantity is a good goal and the resulting garment will reflect the quality.
  7. Sewing is a journey and sometimes there are by-passes and side roads that one takes to get to the final destination.

All that is left for me to do is hem the dress and the lining. And decide on what jacket to make! I am considering the jacket that comes with the dress, but the collar has to be adjusted from the look of it. I also pulled out about four other jacket patterns from my collection and added a couple that I have just recently purchased. I would like to wear this dress and jacket before it is spring! I want to get the jacket started this weekend.

Photos soon.

Sunday, August 12, 2007

What I learned and what I need to know about slopers for fitting.

I wanted to comment on my experience with "De-Mystifying Fit" method of fitting patterns. I used this on the t-shirt pattern. Based on comments at PR, this pattern was said to run big. It does. It runs big compared to the Big 4. Since independent pattern makers are not part of that group their measurements are based on their preference or their frame of reference.

What I learned using my sloper with this pattern:
  1. Pattern is big compared to my sloper.
  2. I need to mark 1/4, 3/8 seam allowance on my sloper to have a better frame of reference to the pattern that I am working on. This pattern uses 1/4 seam allowances, my sloper was at 5/8.
  3. Even with variance in seam allowances I recognized that the pattern was large with first overlay of sloper.
  4. I traced the pattern I thought should fit me and then used sloper. It may be best to lay sloper over the original pattern that had multiple sizes to determine what size you should be tracing first. Then trace that size and begin your adjustments.
  5. One main key to fitting using this method is shoulder point (at neck) to waist. Lynda M (author) says this is constant measurement. Once the shoulder length to waist fits as well as shoulder width and slope, every thing else goes from there.
  6. As with FFRP, Sandra Betzina Fit and perhaps others, first correct the length then focus on the circumference.
  7. I need to read through the entire book before attempting this method. I have a tendency to read through the first few chapters and then say "Okay, I got it, I can do this." As with most all fitting methods, there are numerous exceptions or alternatives to the "general fitting rule adjustment".
  8. The examples given in this CD book are excellent examples and even though some I did not think would be of benefit to me, because I did not see myself having some fitting issues as the person, I actually did or could have them if pattern was off from my sloper.
  9. Overall, I think this method has merit and one I want to continue to work with.
  10. If you own a pattern drafting software program, as I do, with the program you can see your sloper overlaid on the pattern you draft using the program. This is the same principle.

I took some photos of the process but I am not going to post them. You can't see the transformations I made after cutting and sewing the pattern the first time as well as I thought you would. I need a tripod to do these self photos.

Here are the fitting issues I found with first sewing.

  1. Shoulder length was still too long. Some of this is nature of knit. Ended up needing to take an additional inch off of the length. Some of this is my personal fitting preference for t-shirt shoulders.
  2. I used the bust dart with this pattern and thought it was too high so lowered an inch. Was not the thing to do. Again I think because of the knit weight it pulls darts down. Found this to be true with other knit top patterns with darts.
  3. The sleeve length was good.
  4. This pattern is drafted with forward shoulders and because I fit the shoulder point at neck per my sloper then this was perfect for me. I always have to make a FSA. Not with this pattern.
  5. I ended up using 5/8 seam allowances for side seams. Pattern was still too big. Pattern calls for 1/4 seam allowances.
  6. The front neckline area was too big, I could take up about an inch in the center front area and would probably fit much better.
  7. I am not going to give up on this pattern. I think it is really a matter of finding my size using my sloper.
  8. The pattern is drafted well in that side seams line up, shoulders seams line up, sleeves are drafted with the right amount of ease.

I now have a new top to sleep in. The fabric is great and feels soft, so will be a nice sleeping top. But the practice and the learning using sloper overlay to me was priceless. Thanks Lynda Maynard.

August Sewing Simplicity 7295

 I am not doing well as a blogger. I have been working on this project since July 30. Today, I finally finished it. It has been a stop-and-g...